Most vBoX WordPress sites use the SiteOrigin Page Builder, which is based off the classic WordPress editor. This article provides a general overview on how to make changes using the page builder. For comprehensive documentation, visit the SiteOrigin documentation site: https://siteorigin.com/page-builder/documentation/
Newer vBox WordPress sites may use the built-in WordPress Gutenberg editor and not the SiteOrigin Page Builder. If this is the case, refer to the WPBeginner Gutenberg Tutorial.
Add content (rows + widgets)
The page builder consists of rows and widgets. Widgets contain content such as text, images, buttons and custom code. These widgets must sit within a row. Rows are used to customise the layout of the page. A row can consist of just one column (for a full width layout) or many columns.
Add, move, duplicate + delete rows
To add a row:
- Click ‘Add row’
- Enter the number of columns required
- Set a column ratio (‘Even’ is recommended) or drag the widths of the columns
- Make any adjustments in the ‘Row Styles’ section if required (e.g. margins, background colours, etc)
- Click ‘Insert’

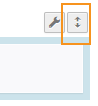
To move a row:
- Click + hold on the up/down arrows button above the row (next to the spanner)
- Drag the row up or down
- Release
To duplicate a row:
- Hover over the spanner above the row
- Click ‘Duplicate row’
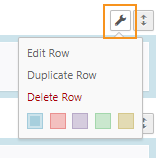
To delete a row:
- Hover over the spanner above the row
- Click ‘Delete row’
- Confirm by clicking the ‘Are you sure?’ question
Add, move, duplicate + delete widgets
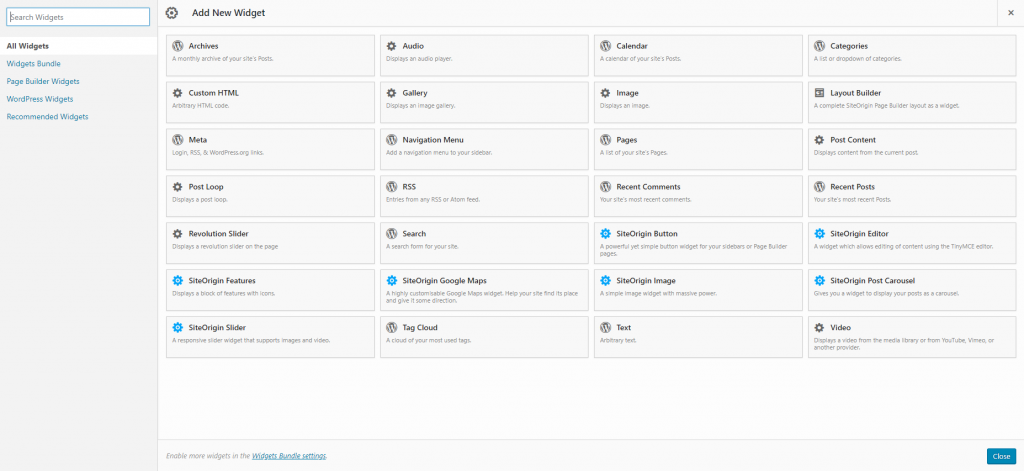
To add a widget:
- Click ‘Add widget’
- Select the required widget (below are commonly used widgets)
- SiteOrigin Editor – for general text + images
- SiteOrigin Button – for buttons/CTAs
- Siteorigin Image – for displaying only images
- SiteOrigin Features – for displaying icons with small amounts of text
- The widget will automatically be placed in the first empty column
To move a widget:
- Click + hold on the widget
- Drag it to another column
- Release
To duplicate a widget:
- Hover over the widget + click ‘Duplicate’
To delete a widget:
- Hover over the widget + click ‘Delete’
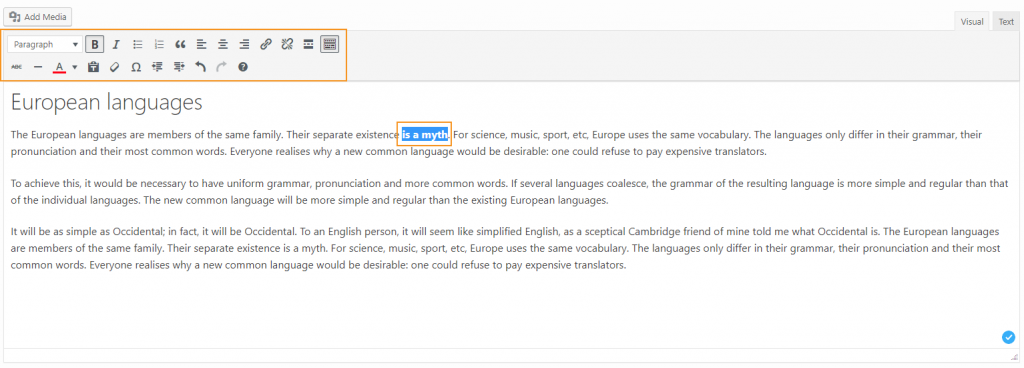
Change font + text styles
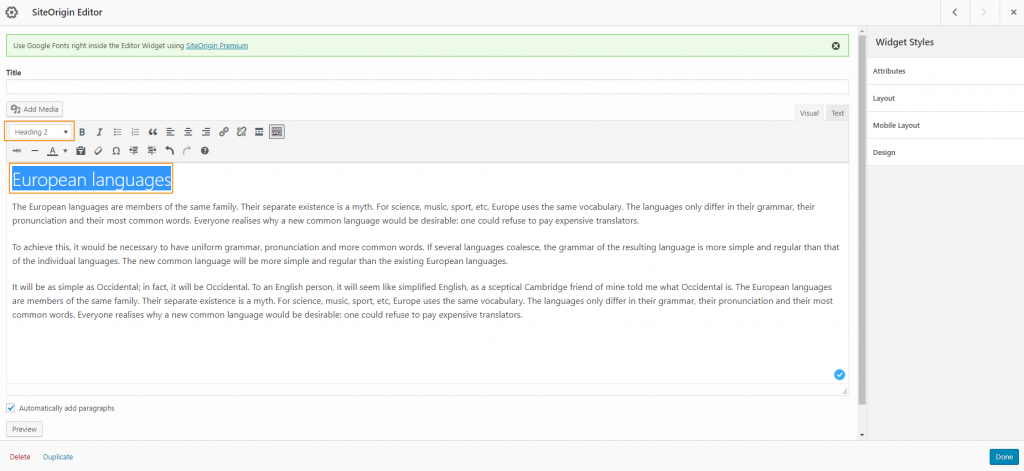
To edit a ‘SiteOrigin Editor’ widget:
- Hover over the widget
- Click ‘Edit’
A pop-up with the WordPress Classic Editor will appear.
To add text:
- Make sure that the editor is set to ‘Visual’ mode + not ‘Text’ mode.
- Begin writing your content in the text area (it is recommended that text is typed directly into the editor, rather than being copied from a Microsoft Word Document)
Create headings
By default, text entered into the editor are formatted as paragraphs. To change a paragraph to a heading:
- Highlight the text
- Click the ‘Paragraph’ drop-down + select a heading size
Headings are hierarchical and are used to create sections of content within the page. ‘Heading 1’ should only be used for the title of the page.
Change font weight, colours, alignment + more
The Classic Editor has a variety of formatting tools that work similarly to Microsoft Word. To format text:
- Highlight the text
- Select a formatting option from the list of tools (e.g. bold, align centre, text colour, etc.)
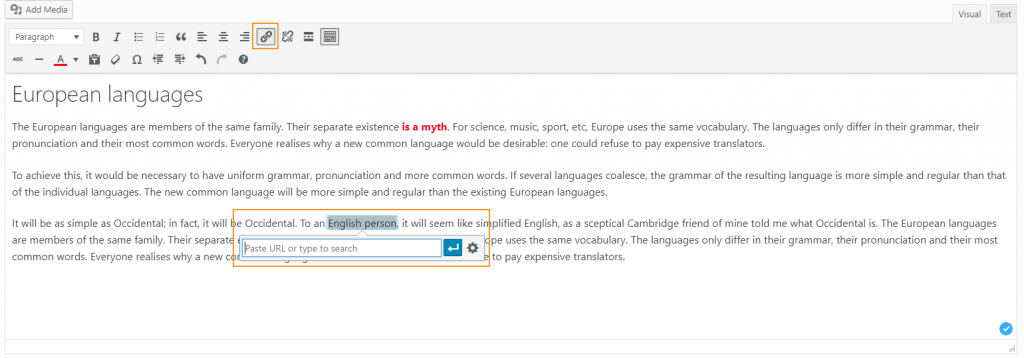
Insert a hyperlink
Link to URL
- Highlight the text to be linked/click the image to be linked
- Click the ‘Insert/edit’ link button
- Search for the page/post to link to, or copy + paste the URL
- Click the ‘Apply’ arrow
Link to document
All documents need to be uploaded to the ‘Media Library’ first. To upload a file:
- Hover over ‘Media’
- Click ‘Add new’
- Upload the document by clicking ‘Select Files’ or by dragging + dropping the file from your computer into the web browser
Once the file has uploaded:
- Click ‘Media’ in the menu to return to the ‘Media Library’
- Click on the document thumbnail in the ‘Media Library’
- Copy the URL from the ‘URL’ field
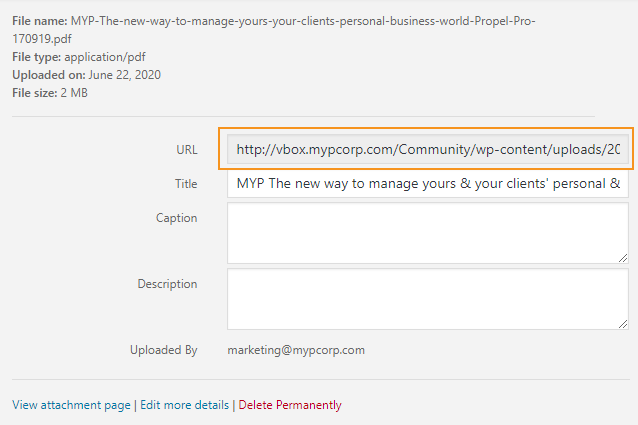
- Return to the page where you want to insert the hyperlink
- Select the text you want to turn into a hyperlink, or paste the link directly
- Highlight the text (or the link)
- Click ‘Insert/edit’ link button
- Paste the document URL
- Click the ‘Apply’ arrow
Insert + edit images
Images, like documents, need to be uploaded to the ‘Media Library’ before being inserted into the site. These steps outline how to insert an image in the ‘SiteOrigin Editor’ widget, but the concept remains the same for different widgets/areas for the site.
- Click ‘Add Media’
- Click ‘Upload Files’
- Upload the image by clicking ‘Select Files’ or by dragging + dropping the image from your computer into the web browser
- Enter any relevant information into the ‘ATTACHMENT DETAILS’ section (it is recommended that ‘Alt Text’ is added to accommodate for visually impaired users of your website)
- Make any adjustments in the ‘ATTACHMENT DISPLAY SETTINGS’ as required
- Click ‘Insert into page’
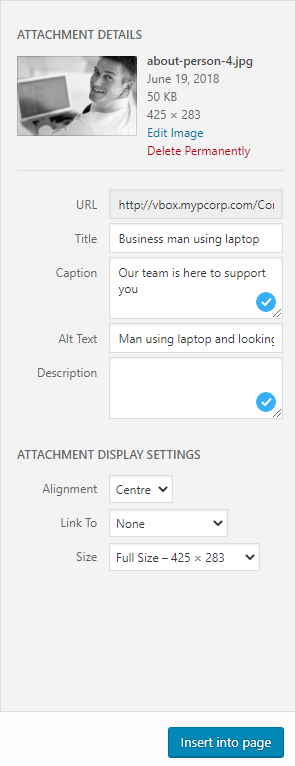
Edit image details
The details of an image (e.g. ‘Alt Text’) can be edited through the ‘Media Library’ or by selecting the image on the page and clicking the ‘Edit’ button.

Resize + align images
An image can be resized by editing the image and making adjustments in the ‘ATTACHMENT DISPLAY SETTINGS’ area or by dragging the handles around the image.
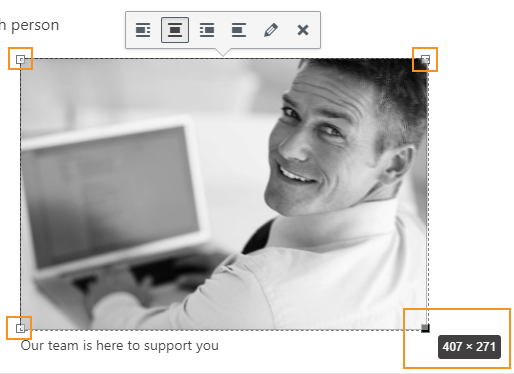
To align an image, simply select the image in the page and click the relevant alignment option.