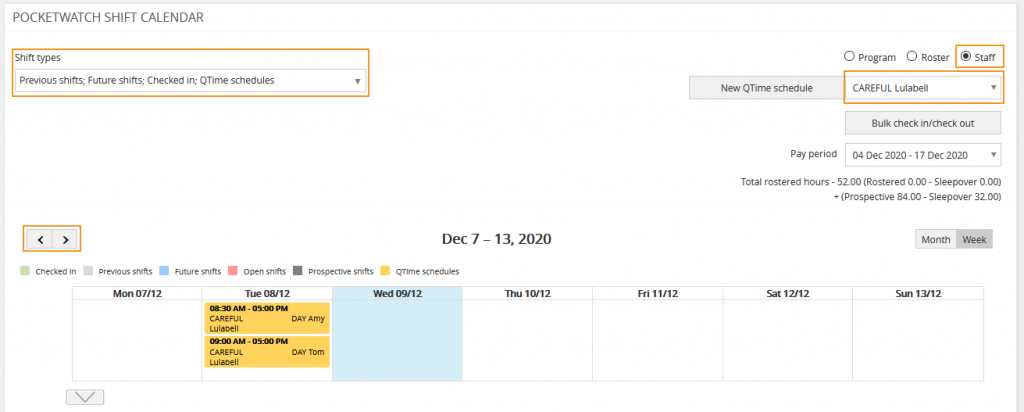
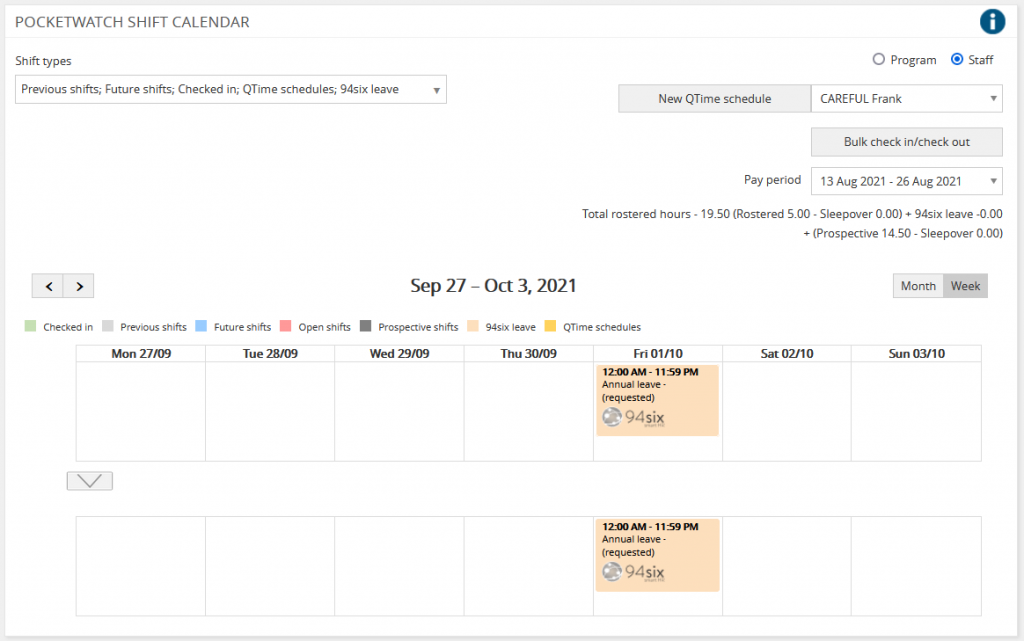
myShifts provides a calendar with upcoming shifts. The calendar has a month, week and day view. Team leaders or managers can view the shifts of their team members or entire rosters. Staff also use this view to see their shifts.
myShifts is the default view for PocketWatch.
View staff member shift
- Select the appropriate staff member from the drop-down
- Select the shift types – Checked in, Previous shifts, Future shifts, Prospective shifts
To move forward or backward in a month or week:
- Select the appropriate arrow
Shift categories are colour-coded as follows:
- Checked in – green
- Future shifts – grey
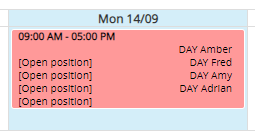
- Open shifts – pink
- Partially filled shifts – yellow
- Prospective shifts – dark grey
- Published shifts – aqua
- Unfilled shift – red
- QTime schedule – dark yellow
- 94six leave – light yellow (94six subscribers only)
NB: You can only view the myShifts calendar for staff that are members of a team you manage or listed as associated staff in a roster you are the manager for. Prospective shifts can only be seen by staff with the following relevant permissions.
- PW Create Edit Rosters
- PW Create Edit Roster Global
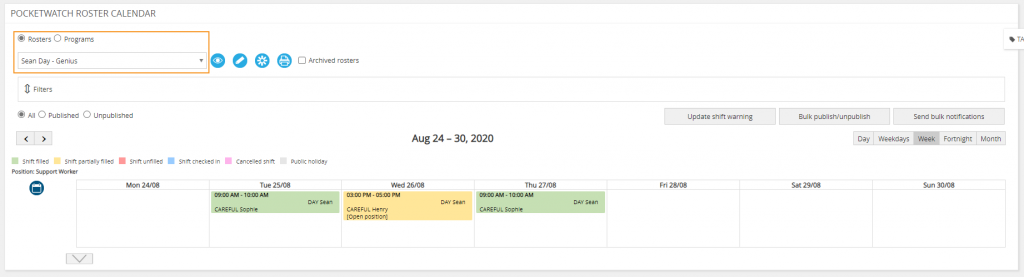
View roster
- Select Roster
- Select the appropriate roster from the drop-down
- Select month or week view
- Select the shift type
- Prospective shifts
- QTime schedules
- 94six leave (94six subscribers only)
To move forward or backward in a month or week:
- Select the appropriate arrow
Shift categories are colour-coded as follows:
- Checked in – blue
- Future shifts – grey
- Cancelled shifts – pink
- Partially filled shifts – yellow
- Prospective shifts – dark grey
- Published shifts – aqua
- Unfilled shift – red
- QTime schedule – dark yellow
View leave (94six subscribers only)
Subscribers that have a 94six subscription will also be able to see approved leave request in the shift calendar.
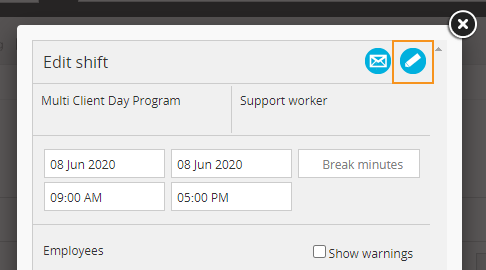
View shift duration
View the length of a shift from the rosters page and when printing the rosters.
- Select Roster
- Click the ‘Show shift duration’ checkbox in the top right corner

- Open filters + set required filter + search
- Select any roster with shifts from the dropdown
- Shift duration will be displayed

Shift duration can also be displayed when printing the rosters:
- Select ‘Print View’ icon
- ‘Show shift duration’ checkbox should still be visible
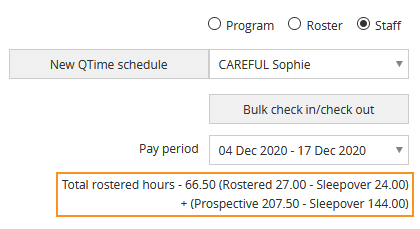
View rostered hours
View rostered hours per staff member via myShifts:
- Select staff member
- Select pay period
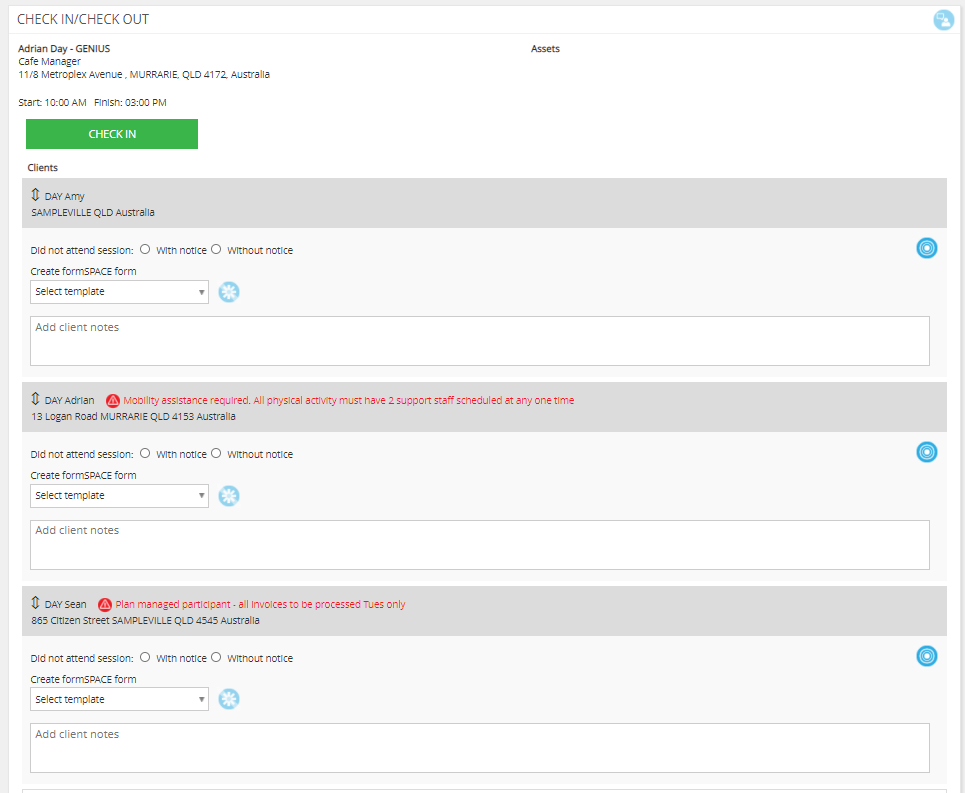
Manage staff check in + check out
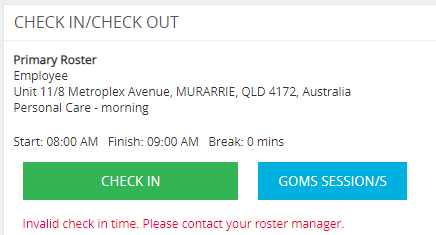
Staff check in/out of shifts via myShifts:
- Select the shift
- Select ‘CHECK IN’

- If client did not attend session, select ‘With notice’ or ‘Without notice’
- Select cancellation reason from the drop-down
- Create GOMS session (if applicable)
- Create formSPACE form (if applicable)
- Add client notes – these notes are added to the client attached to the shift in their history in ARM
- Complete tasks (if applicable)
- Add roster manager notifications (if applicable)
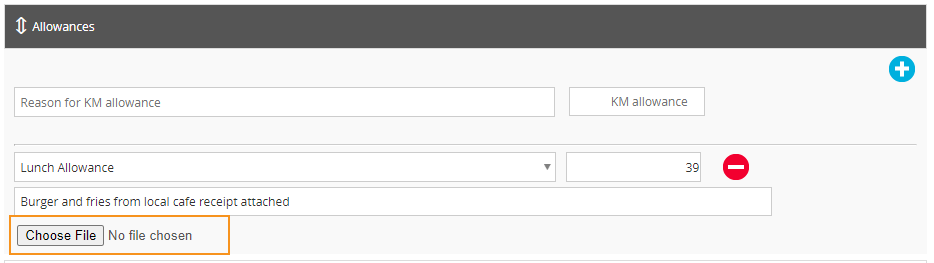
- Add allowances (if applicable)
- Add general notes – these notes are added to all clients that are attached to a shift
NB: General notes will not be saved against absent clients.
When the ‘Enable creation of GOMS session on shift check in for each client (mobile device friendly)’ setting is applied in PocketWatch > Settings > Shifts, a GOMS session for each client attached to the shift opens via the GOMS icon. It is greyed out once the GOMS session has been completed.
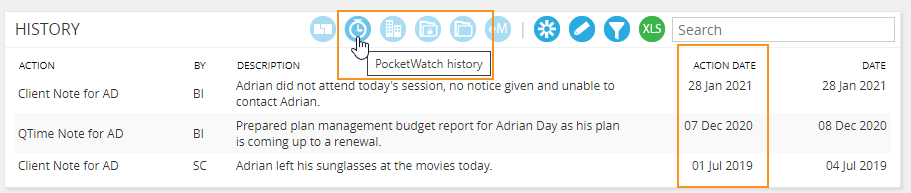
NB: Client and general notes can be found in the client’s history within ARM by clicking on the ‘PocketWatch history’ filter icon in the ‘History’ panel. Action Date Column is the activity date, eg. PocketWatch shift start date or QTime schedule date.
Record sleep disturbance during a sleepover shift:
Start sleep disturbance:
- Select shift
- Select orange ‘Disturb’ button
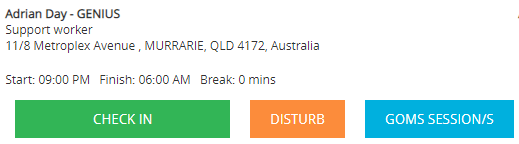
End sleep disturbance:
- Select shift
- Select red ‘Disturb’ button
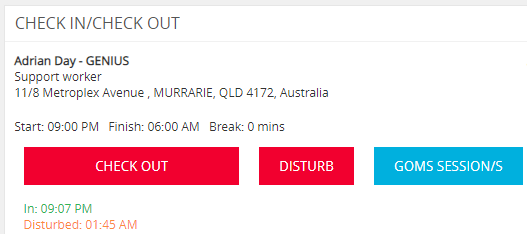
The following warning message will appear dependent upon the timesheet settings: ‘Invalid check in or check out time. Please contact your roster manager.’
Staff can add relevant files for check out of a shift:
- Choose file
- Select ‘Upload’
- Select ‘Save’
NB: If geolocation has been enabled, please refer to ‘Manage geolocation tracking for timesheet check in/out‘.
If a client did not attend a session staff can select did not attend with or without notice. Without notice will auto generate a 90% invoice for those rosters and shifts with line items attached from GENIUS.
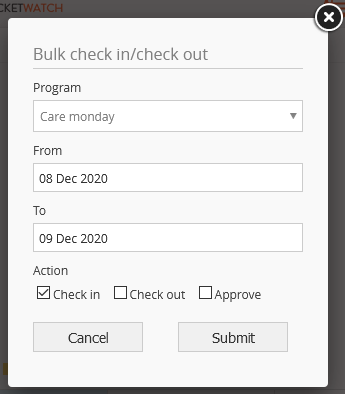
Manage bulk check in/check out
Shifts can be checked in/out for program rosters in bulk.

- Select ‘Bulk check in/out’
- Select the program from the drop-down
- Enter in the ‘From’ + ‘To’ dates
- Select the appropriate action
- Check in
- Check out
- Approve – selecting this will approve the timesheets associated with the shifts
Manage flexible shift check in + check out
Staff who have been allocated to a flexible shift roster check in/out of shifts via myShifts will have a flexible shift check in option on their myShifts page.

- Select ‘Flexible shift check-in’
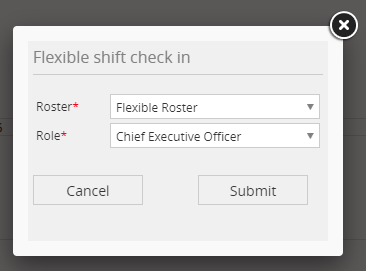
- Select roster from menu
- Select role
- Select ‘Submit’
NB: Selecting ‘Submit’ will open a ‘Check in/Check out’ option on the shift and staff will then follow the usual procedure. This will also create a timesheet. Roster managers will follow the usual procedure for managing timesheets. Check in time zone is set from the ‘State’ field in the template.
NB: Flexible check in is also available in the mobile view.
NB: If geolocation has been enabled, please refer to ‘Manage geolocation tracking for timesheet check in/out‘.
Manage open shift
Administer open shift
When a roster is created, the Roster Manager can link specific staff or teams to that roster. All staff linked to a roster will be able to view the roster once published, including any open shifts.
To request or assign specific staff to an open shift in an unpublished roster:
- Select ‘Rosters’
- Select roster template
- Select ‘Open position’
To request specific staff:
- Add staff from list
- Select ‘REQUEST STAFF’
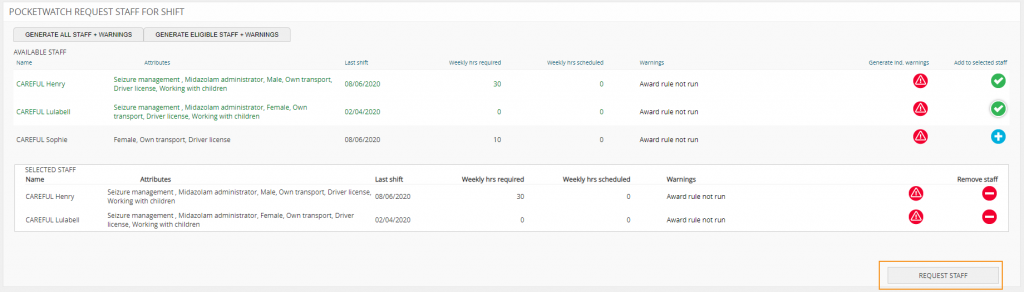
NB: Requested staff will each receive an email and SMS (if SMS is enabled). A response to the SMS of “Yes” or “Y” is regarded as confirmation from that staff member that they accept the shift, and the first staff member to respond is assigned the shift.
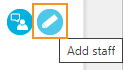
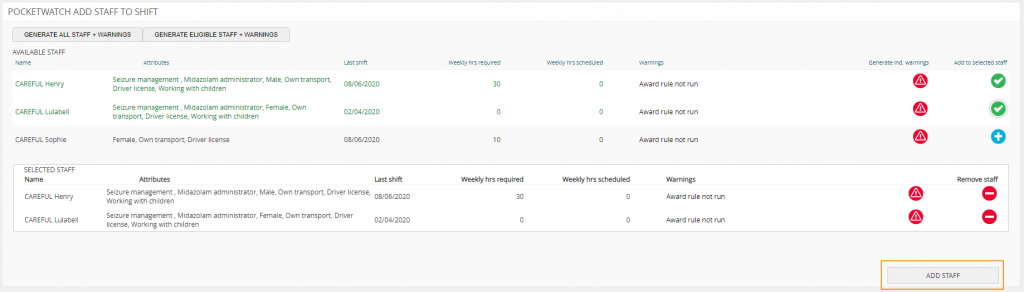
To assign specific staff (so that the shift is no longer open):
- Select ‘Add staff’
- Add staff from list
- Select ‘Add staff’
Select open shift
Once an open shift has been published, it is visible to:
- Requested staff (if Roster Manager selected ‘Request staff’)
- All staff linked to the roster
The shift will be visible to those staff via:
- Mobile site
- View ‘Open shifts’
To nominate for the shift:
- Select ‘Request shift’
- Add note
NB: The roster manager can review staff nominations via email and select which staff to assign to the shift.