The next step of the HCP roster workflow is to establish rosters & shifts for staff. Visibility of shifts is found on the PocketWatch Roster Calendar.
Viewing Rosters in PocketWatch
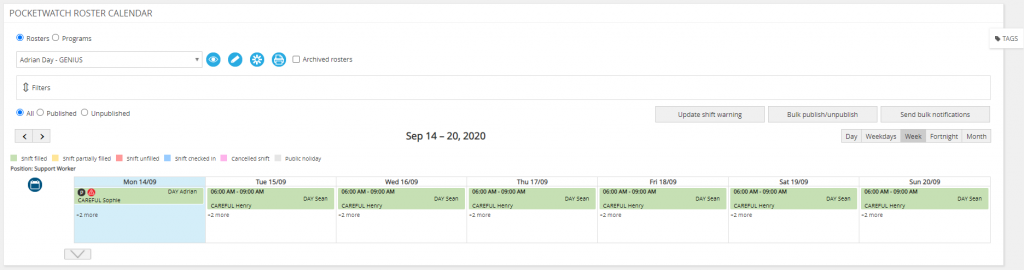
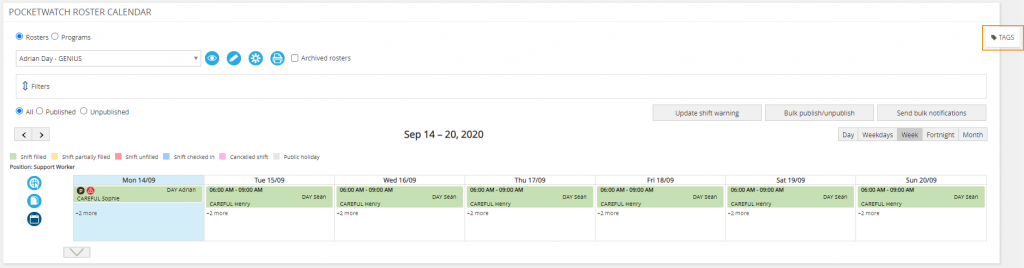
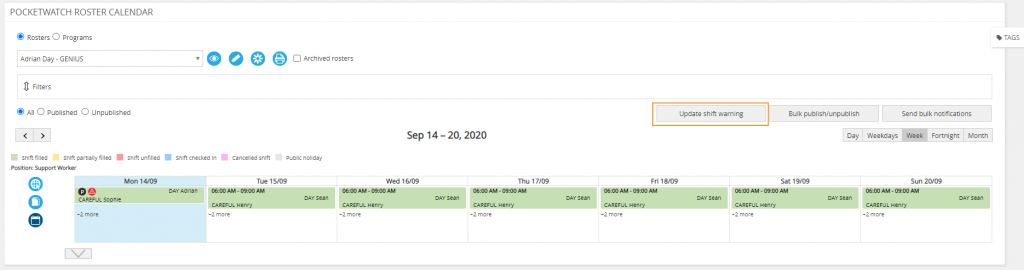
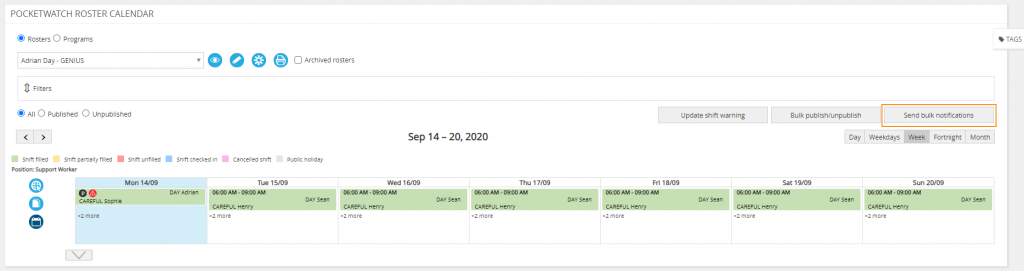
The PocketWatch Roster Calendar view shows a calendar with all shifts on a selected roster.
There are two styles of rosters:
- Defined roster – a start and end date (for example, a one-day event)
- Rolling roster – ongoing with no end date
A roster has one or more roster managers who receive all notifications for shift changes and cancellations. Only a roster manager can see unpublished shifts as well as add, edit and manage shifts in a roster. If a staff member has the permission, the creator of a roster is a roster manager by default. Additional roster managers can also be added. All staff linked to a roster will be able to view the roster, as well as any open shifts. Roster managers are the only staff who can add a shift to the roster. Staff with the ‘View shift details’ permission enabled will be able to view any published shift in any roster in a read-only view.
Shifts are colour-coded as follows:
- Checked in – Green
- Future shifts – Grey
- Open shifts – Purple
- Published shifts – Aqua
NB: Staff who are not roster managers can see the published shifts and their times and assigned staff members on the roster’s page.
Create HCP Roster
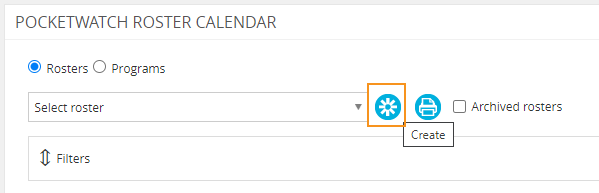
- Select ‘Rosters’ from the menu
- Select ‘Create’
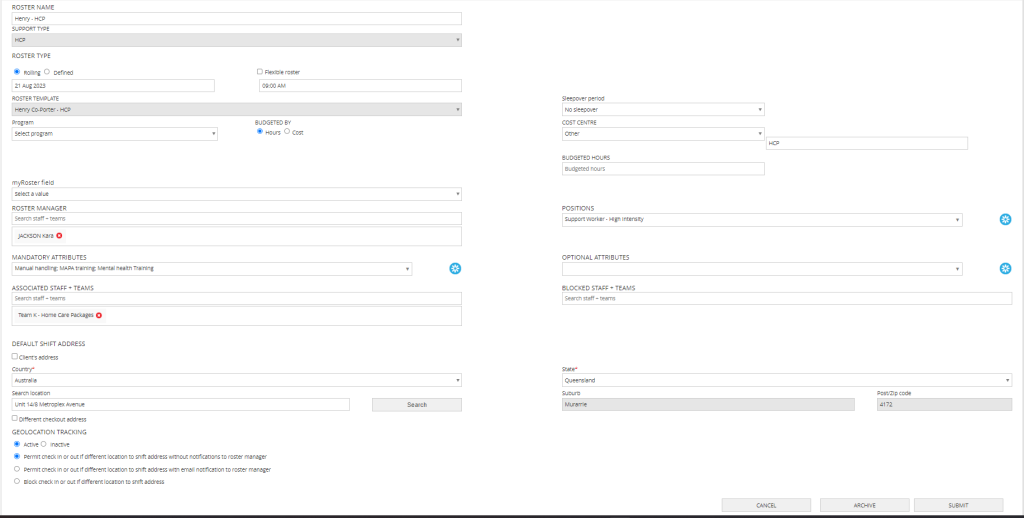
- Enter roster name
- Select roster type as HCP
- Select roster template (if applicable)
NB: Selecting/re-selecting roster template will overwrite fields that are pre-set in the roster template.
- Enter cost centre
- Enter budgeted hours
- Select the roster manager
- Select roster positions from drop-down
NB: New positions can be created by selecting the ‘Create’ button. Positions can also be archived and unarchived. To see archive positions, navigate to PocketWatch settings and filter by ‘Show archived’.
NB: When positions are removed from a roster, it will remove all associated shifts within the roster.
- Select mandatory roster attributes from drop-down
NB: New attributes can be created by selecting the ‘Create’ button.
- Select optional roster attributes from drop-down
NB: New attributes can be created by selecting the ‘Create’ button.
- Select associated staff
- Select blocked staff (if applicable)
NB: Number of staff per shift defaults to 1 but can be changed if additional staff are required.
- If Geolocation has been enabled select fields for ‘Geolocation tracking’
- Select the default shift address
- Select ‘Different checkout address’ if applicable
- Select ‘Submit’
NB: It is essential that you select the correct country and state. These are required fields to support differing time zones and daylight saving. The check in time only supports AU and UK addresses. All other addresses will default to AEST time.
Edit roster
- Select ‘Roster’ from the menu
- Select ‘Edit’
- Make appropriate edits
- Select ‘Submit’
NB: You can drag and drop shifts between days.
View roster
- Select ‘Roster’ from the menu
- Select the appropriate roster from the drop-down
NB: Selecting the arrow button beneath each position shows and hides the hourly day view.
Publish roster
- Select ‘Roster’ from the menu
- Select the appropriate roster from the drop-down
- Select ‘Publish’
- Select ‘Bulk publish/unpublish’
- Enter the from and to date
- Select ‘Force publish or normal publish’
- This will evaluate warnings and publish all shifts from the selected period. As this process may take some time, you will be notified via email on completion. Force publish will publish shifts even if they have warnings. Normal publish will only publish shifts without warnings.
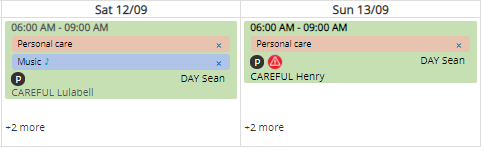
Once a shift has been published a ‘P’ icon will appear.
NB: Publishing rosters is a queued process which is run in the background.
This enables you to work on multiple rosters and activities across the system without having to wait for a loading screen while rosters are being published.
However, this also means that if several rosters are being published at once, there may be a delay before the roster is published. The roster manager and the person who published the rosters will receive an email notification confirming that rosters have been published.
The recommended best practice process is to always publish rosters in advance (e.g. for the next fortnight).
Unpublish roster
- Select ‘Roster’ from the menu
- Select the appropriate roster from the drop-down
- Select ‘Bulk publish/unpublish’
- Enter the ‘From’ and ‘To’ date
- Select ‘Unpublish’
This will unpublish all published shifts that have not been checked in from the selected period. As this process may take some time, you will be notified via email on completion.
A roster that has not been published will not have a ‘P’ icon on each shift.
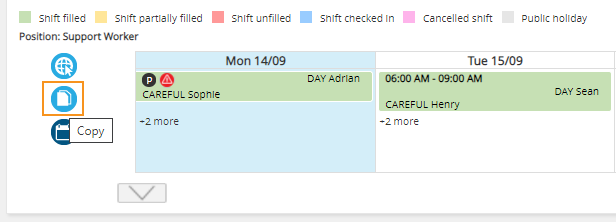
Copy roster
- Select ‘Roster’ from the menu
- Select the appropriate roster from the drop-down
- Select ‘Copy’
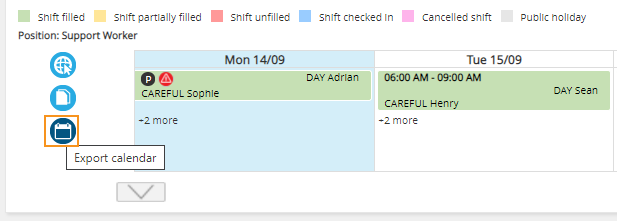
Export roster to iCal
- Select ‘Roster’ from the menu
- Select the appropriate roster from the drop-down
- Select ‘Export calendar’
Add clients to program
Roster managers can assign clients to a program.
A program is a way of grouping specific types of rosters or groups of clients.
- Select ARM
- Search relevant client
- Select ‘Edit’ against relevant contact
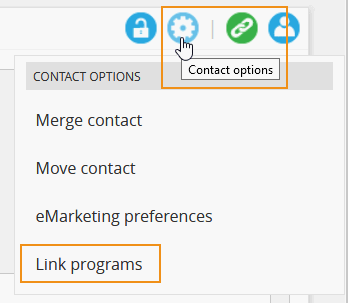
- Select ‘Contact options’
- Select ‘Link programs’
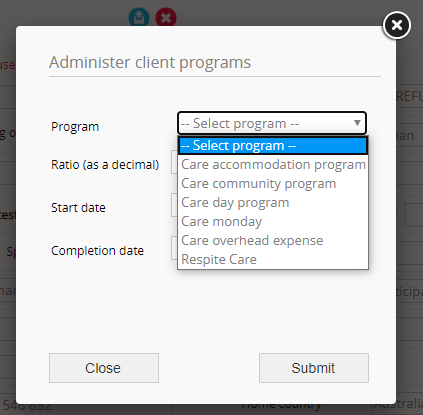
- Select the relevant program
Add staff to shift
Roster managers can assign staff to shifts.
Available staff are based on:
- Availability (both weekly availability and annual/personal leave)
- Attributes
- Award rules
The text colour of the staff member is based on the award rule definitions.
- No rules apply – Black
- Defined rules – Orange or Red
All warnings from rules are also displayed. Additionally, if a staff member is added to a shift and they do not possess the associated attribute/s, a warning identifying the specific missing attribute/s will be displayed. An email alert to the roster manager will be generated if staff are added to shifts and warnings or notifications apply.
Add tags to shift
Roster managers can assign specific tags to shifts. This can be actioned at the roster template level or at the roster level.
Once tags are created in the settings they will appear on the side and are able to be dragged and dropped to a shift.
Use shift quick edit
Quick edit allows a fast one level down edit of a shift and is designed to be an efficient way to quickly add or apply changes to a current shift.
- Select the appropriate roster from the drop-down
To move forward or backward in a month or week:
- Select the appropriate arrow
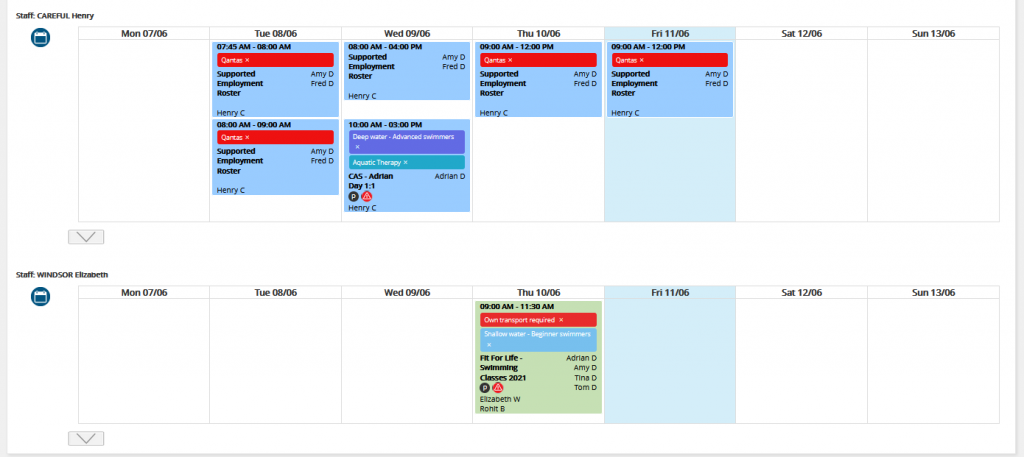
Shift categories are colour-coded as follows:
- Shift filled – green
- Shift partially filled – yellow
- Shift unfilled – red
- Shift checked in – blue
- Cancelled shift – pink
- Public holiday- light grey
- QTime schedule – dark yellow
NB: Only roster managers can edit shifts in this view.
- Select the shift for edit by double clicking the required shift
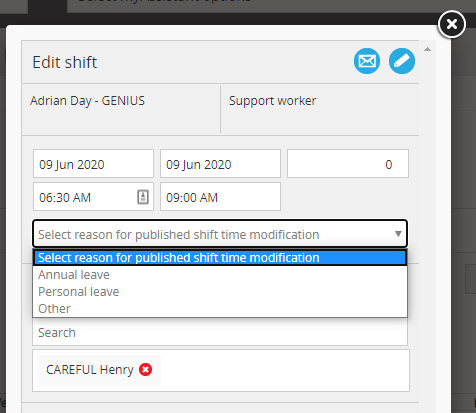
NB: A reason must be entered in the comment section if the shift has already been published.
- Choose to ‘Unpublish’ and ‘Publish’ as required
- Select ‘Issue a notification’ will send an SMS or email to the relevant staff members
- Select ‘Save’
NB: If the shift is published, any staff who are removed or added will receive an automated notification.
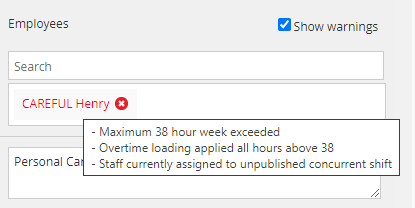
To view warnings, select the ‘Show warnings’ check box:
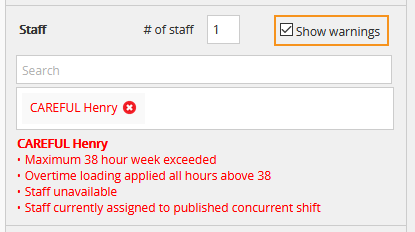
Any staff who have warnings will appear in Red or Orange.
Mouse hover over text also provides the details.
Roster managers via quick edit can:
- Add additional employees
- Unpublish a shift
- Issue a notification
- Update times
- Update assets
- Update attributes
Create staff leave application
Roster managers, with the relevant 94six leave permissions enabled, can create a leave application via the shift quick edit for staff members that are unable to attend the shift due to illness or unexpected leave.
To create leave application:
- Select the appropriate roster from the drop-down
- Select the shift for edit by double clicking the required shift
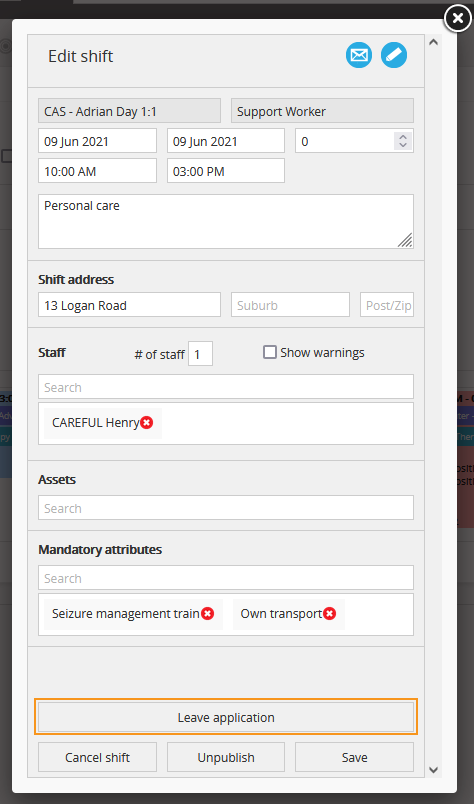
- Select ‘Leave application’
- This will navigate to 94six where the leave application can be completed + submitted
Update shift warnings
After a warning cause has been updated, there is an option to update all warnings on shifts within a selected time period. Once the Roster Manager has identified and rectified a warning, clicking this button will update all warnings, removing any warning icons from shifts.
Update the warning cause ie invalid role – change the role or add as an additional role to the relevant staff member.
- Select the appropriate roster from the drop-down
- Select ‘Update shift warning ‘
- Enter the relevant time periods
- Select ‘Confirm’
NB: Only Roster Managers can update rosters.
NB: A shift warning report is available under Reports.
Use shift deep edit
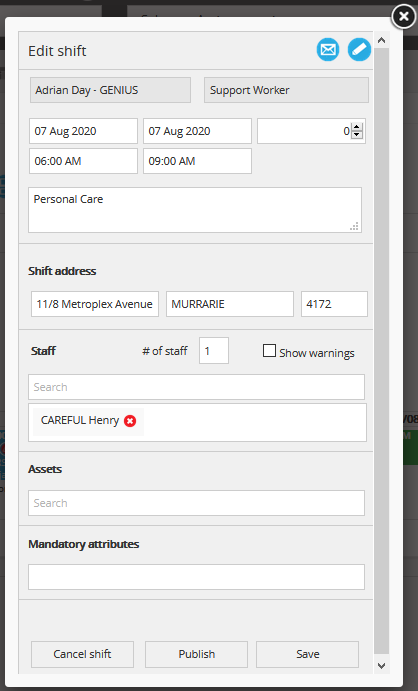
Entering the deep edit mode in a shift provides access to all details.
- Select the appropriate roster from the drop-down
- Select the shift
- Select ‘Edit’
NB: Only roster managers can edit shifts in this view.
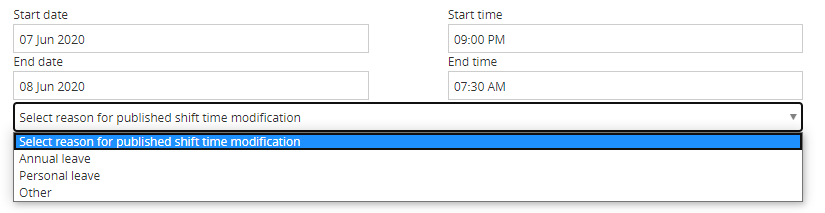
NB: A reason must be entered in the comment section if the shift has already been published.
- Choose to ‘Unpublish’ or ‘Publish’ as required
- Select ‘Issue a notification’ will send an SMS or email to the relevant staff members
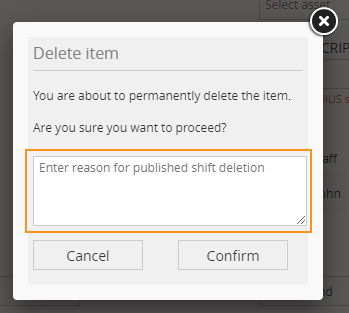
- Select ‘Save’ or ‘Delete’
NB: A reason must be given if deleting a published shift.
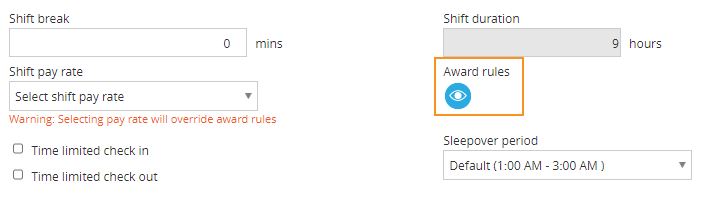
To view warnings, select the ‘Add staff icon or ‘Request staff icon’:

To view all warning, select ‘Include ineligible staff’:

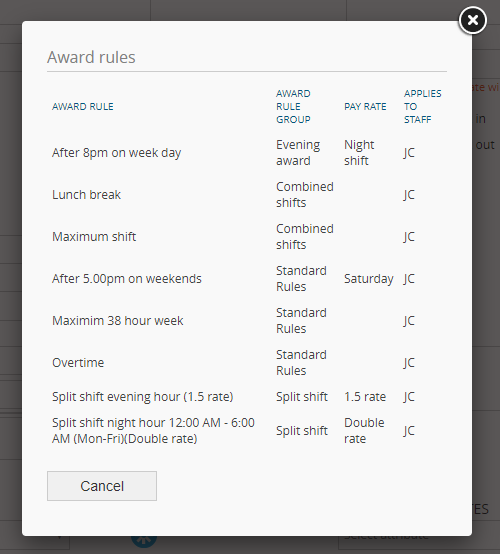
A view all warnings applied to a shift icon is available at the edit shift level – Select Award rules:
Request staff for a shift:
- Select the appropriate roster from the drop-down
- Select the shift
- Select edit
- Select ‘Request staff icon’

- Select the required staff
- Select request staff
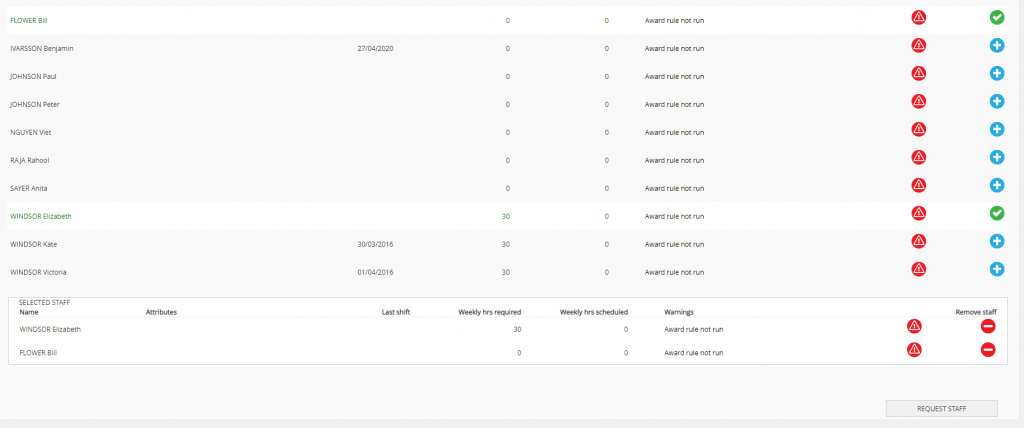
NB: The request staff page will only send an SMS and no email. This functionality relies on the staff member to respond with “Yes” or “Y” to be added to the shift if there is still an open spot. SMS must be enabled for this to function.
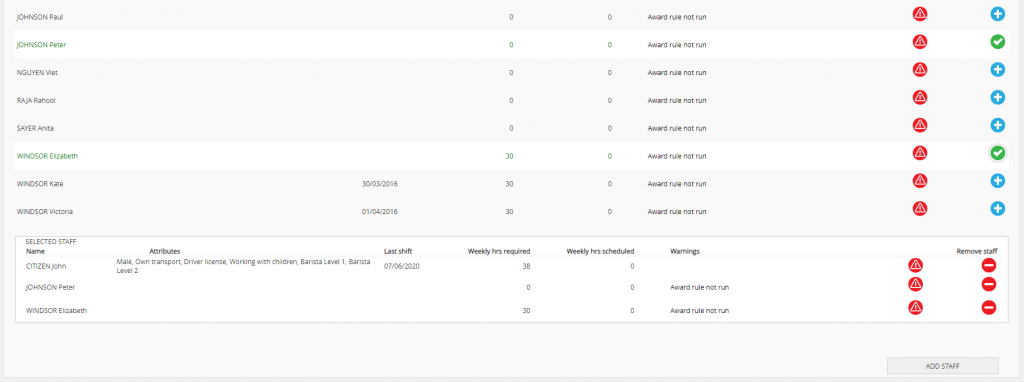
Add staff to a shift:
- Select the appropriate roster from the drop-down
- Select the shift
- Select edit
- Select ‘Request staff icon’

- Select the required staff
- Select ‘Add staff’
From the deep edit page, you can also send a SMS notification to staff on the shift.
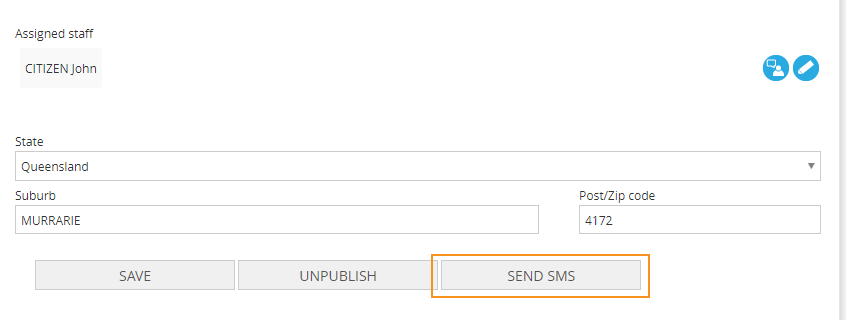
- Select ‘SEND SMS’
- Add SMS details
- Select ‘CONFIRM’
NB: SMS will be sent to the staff on shift via their first mobile number in ARM.
Add shift
An additional shift can be added to a roster from the roster page.
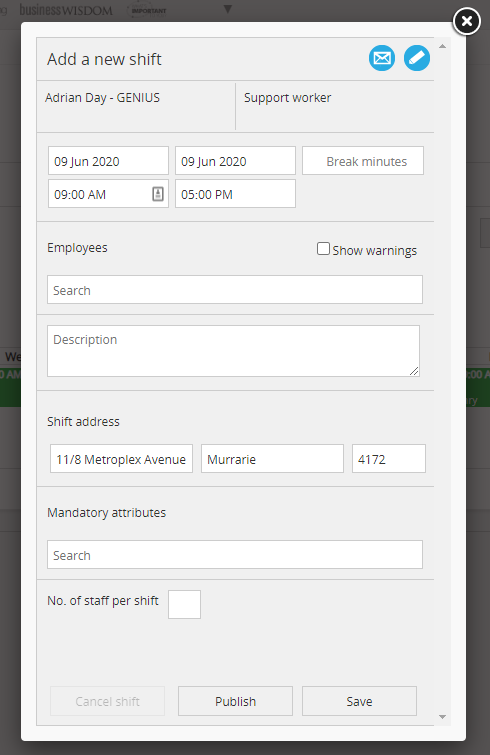
- Select the roster
- Choose the relevant position
NB: These are the positions that are already assigned to that roster. To add a new position, navigate to the roster and select edit.
- Enter client
- Enter the relevant details
- Select ‘Save’, ‘Publish’ or ‘Issue notification’
Accept shift
Staff who receive a request shift notification are required to reply to accept the shift.
NB: A reply of “Yes” or “Y” will indicate acceptance of the shift and the first response will automatically be added to the shift. If the shift has been allocated to an earlier reply, the staff member will receive an SMS notification explaining the shift has already been filled.
The following text message will be sent:
DO NOT REPLY UNLESS ACCEPTING SHIFT
Shift request:
Start: xStartx
End: xEndx
Roster: xRosterx
Position: xRolex
Client/s: xClientsx
Address: xAddressx
REPLY TO ACCEPT SHIFT ONLY.
NB: SMS messages are generated through the MYP system not via a mobile phone service.
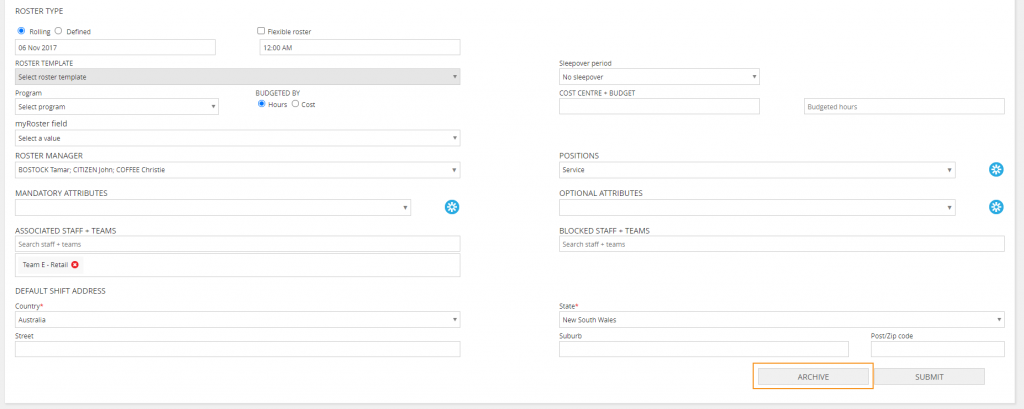
Archive roster
Rosters can be archived but not deleted.
To archive a roster:
- Select the appropriate roster
- Select ‘Edit’
- Select ’Archive’
NB: If staff receive SMS notifications, then SMS notifications will be sent to all staff assigned to shifts associated with this roster when archiving.
To ensure that staff do not receive automated SMS notifications when the roster is archived:
- Select PocketWatch > Settings > Global
- Select ‘Email’ for ‘ARM notifications sent via’
- Archive roster
- Select PocketWatch > Settings > Global
- Re-select ‘Email’ or ‘Both’ for ‘ARM notifications sent via’
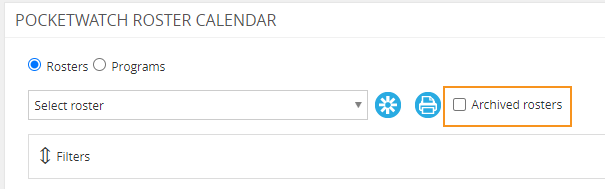
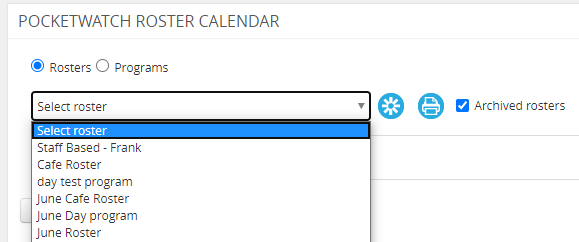
View archived roster
- Select PocketWatch > Rosters
- Check the ‘Archived roster’ box
- Select appropriate roster from the drop-down
Unarchive roster
- Select PocketWatch > Rosters
- Check the ‘Archived roster’ box
- Select appropriate roster from the drop-down
- Select ‘Edit’
- Select ‘Unarchive’
Create flexible roster
If you require staff to have fluid start and finish times, there is the option to create a flexible roster.
- Select PocketWatch > Rosters
- Select ‘Create’
- Enter roster name
- Select roster type
NB: Rolling roster will be an open roster that continues. This is a good option for a flexible roster but not essential. A defined roster has a set start and finish date.
- Enter cost centre and budget (if applicable)
- Select Client organisation from the drop-down (if applicable)
- Select Client from the drop-down (if applicable)
- Select template type (if applicable)
- Select ‘Flexible roster’
- Select ‘Roster manager’
- Select roster positions from drop-down
NB: New positions can be created by selecting the ‘Create’ button.
NB: When positions are removed from a roster, it will remove all associated shifts within the roster.
- Select mandatory roster attributes from drop-down
NB: New attributes can be created by selecting the ‘Create’ button.
- Select optional roster attributes from drop-down
NB: New attributes can be created by selecting the ‘Create’ button.
- Select associated staff
- Select blocked staff (if applicable)
- Select the default shift address
- Select ‘Submit’
Send bulk notifications
To send bulk roster notifications:
- Select a roster
- Select send bulk notifications
- Select ‘From’ and ‘To’ dates
- Select ‘Send’
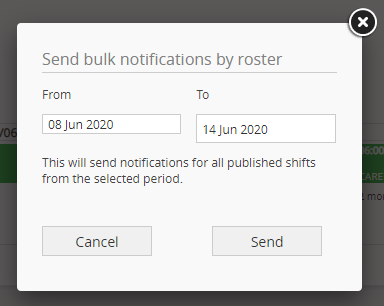
An email with a bulk notifications link for that period will be sent from the system to each staff member in the roster.
NB: Notification delivery type is defined in PocketWatch > Settings > Notifications.
The staff member will select the link which will take them to a page with all their shifts listed.
NB: The calendar will always display from the day of week specified in the PocketWatch settings. Adding or removing shifts from a roster within the date range will carry across to this bulk view page. If notifications are set to SMS only, bulk shift notifications will still use email addresses.
Create split shift
The split shift functionality is available at a roster and a template level. It is designed specifically to allow multiple pay rates to be calculated across two days. It is not necessary to create a split shift for shifts that are contained in one day as the award rules will manage the different pay periods.
For example, a shift that runs from Wed 3:00pm until Thursday 9:30am has the following pay rates:
- 3:00 PM – 10:00 PM (Evening hours) Evening rate (1.5)
- 10:00 PM – 6:00 AM (Night hours) Double rate (2)
- 6:00 AM – 9:30 AM (Normal hours) Normal rate (1)
For this feature to be functional, the following need to be customised and set up prior to creating the split shift:
- Time periods
- Pay rates
- Award rule
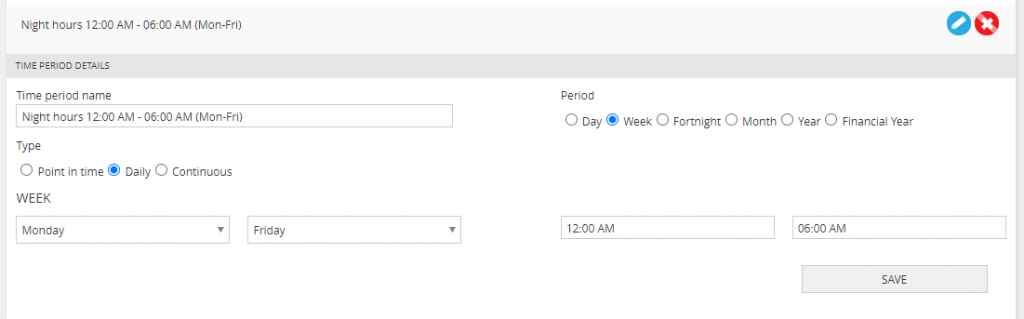
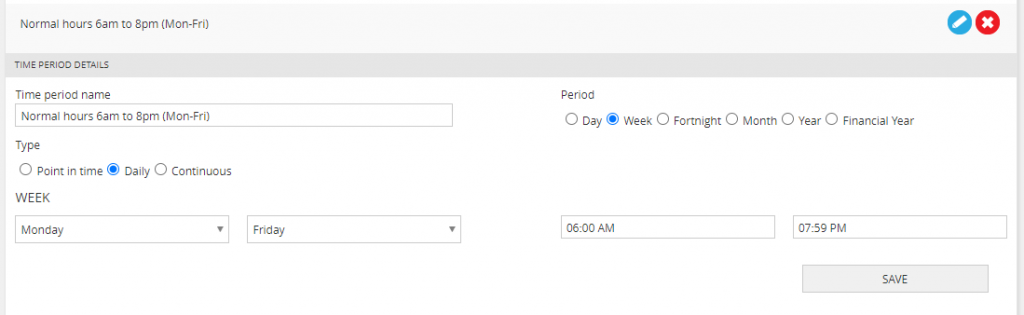
Step 1. Create the following time periods:
- Select ‘Time period’ from the menu
- Select ‘Create’
- Enter the name
- Select the period
- Select the type
- Select ‘Save’
Evening hours 8:00 PM – 11:59 PM (Mon-Fri)

Night hours 12:00 AM to 06:00AM (Mon-Fri)
Normal hours 6:00 AM to 8:00 PM (Mon-Fri)
Step 2. Create the following pay rates:
Access ‘Pay rate’ settings:
- Select PocketWatch > Settings
- Select ‘Pay rate
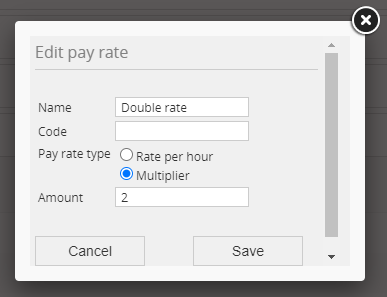
Add a pay rate:
- Select ‘Create’
- Enter the pay rate name
- Enter the per hour amount or multiplier
- Select ‘Save’ in the pop-up box
- Select ‘Save’
1.5 rate (multiplier 1.5)

Double rate (multiplier 2)
Step 3. Create the following award rules:
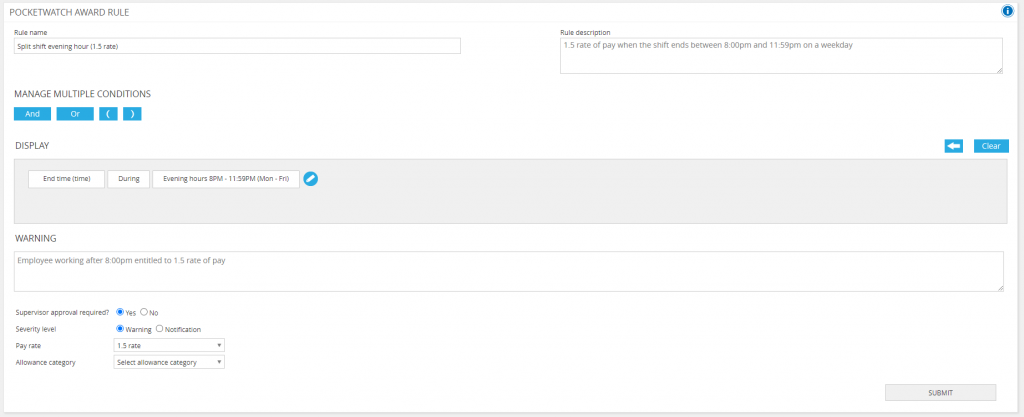
Split shift evening hour (1.5 rate)
The formula is read as End time(time) > During > Evening hours 8:00 PM – 11:59 PM (Mon-Fri)
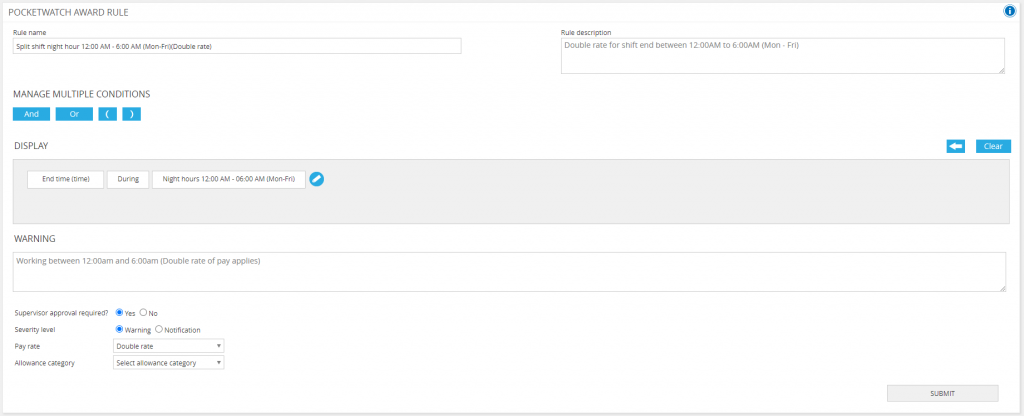
Double rate
The formula is read as End time (time) > During > Night hours 12:00 AM – 06:00 AM (Mon-Fri)
Step 4: Apply the award rules to the relevant staff under the award rule group.
Step 5: To create a split shift:
- Shift start time – 03:00 PM
- Shift end time – 09:30 AM
- Change standard or split shift selection to ‘Split’
- Add a new split entry to the list and change the duration to 420 mins (3pm-10pm)
- Add another split entry to the list and change the duration to 480 mins (10pm-6am)
- Add final split entry and change the duration to 210 mins (6am-9:30am)
- Click ‘Save’
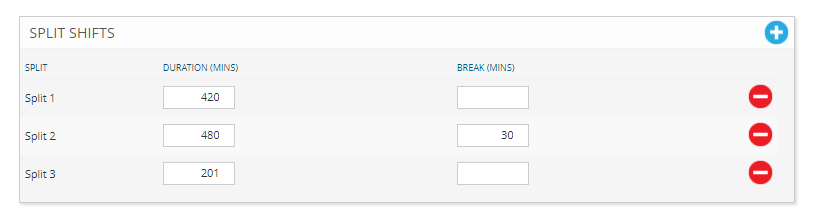
A split shift may also require break minutes. Enter break minutes to deduct from total hours in cost allocation process.
- Check in and out
- Review the timesheet:
- Double rate – 8 hours
- 1.5 rate – 7 hours
- Standard rate – 3.5 hours
Filter rosters
Rosters can be viewed through a series of filters including:
- Client
- Staff
- Team
- Location
- Assets
- Status
- Time period
- Tag
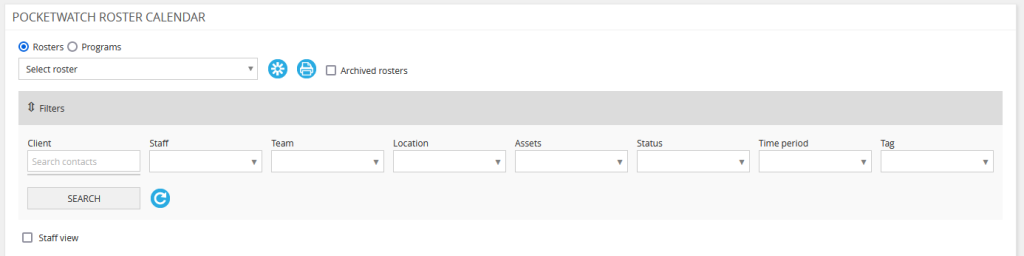
- By selecting all rosters the filter is a view only option
- By selecting a specific roster the filter is an editable option
- By selecting ‘Staff view’, all shifts will be displayed for each relevant staff member
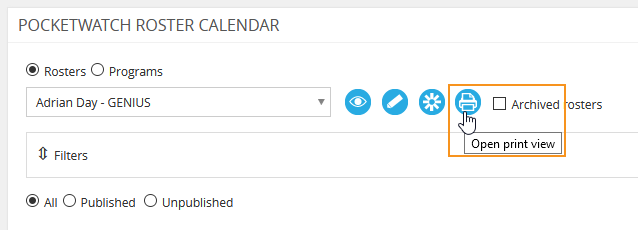
Print roster
To print off your rosters or view a simplified view of them, select the ‘Open print view’ icon.