If you are a Plan Manager using OCR to process invoices, you now have the option to set up the Bulk OCR function to assist in automating the creation of claims.
Enable OCR
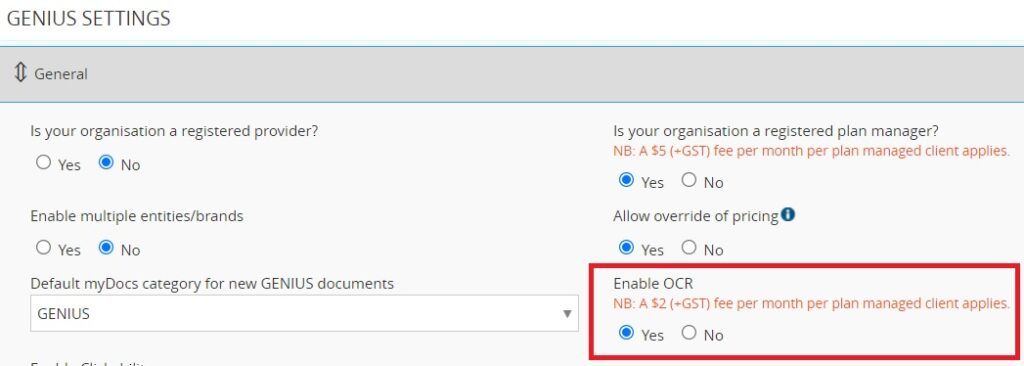
- Navigate to GENIUS > Settings > General
- Ensure OCR is enabled by selecting the ‘Yes’ option under ‘Enable OCR’
- Please note, you may already have OCR enabled. If this is the case, you can proceed to the next step – Enable Bulk OCR Functionality.
Enable Bulk OCR Functionality
- Once the standard OCR function has been enabled, you now have the option to enable Bulk OCR.
- Switch the ‘Whitelist email address for Bulk OCR’ to On. This will enable the Bulk OCR functionality.
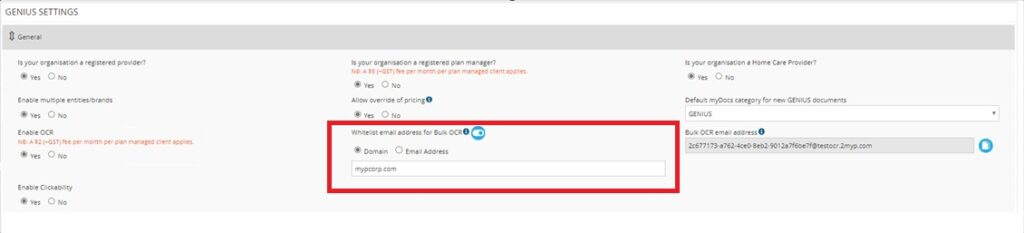
- Determine whether you want emails to be permitted from a particular domain, or simply from one or two specific email addresses. This may be dependent on where your invoices are directed to and if you are giving multiple staff members or email addresses the ability to send invoices through to the Bulk OCR function.
- If you select ‘Domain”, enter the appropriate domain. For example, if mypcorp.com was entered, then any emails being forwarded to the Bulk OCR function from an email ending in ‘mypcorp.com‘ would be permitted to create a claim from that invoice.
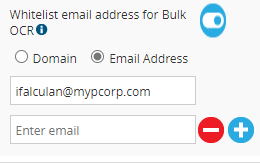
- If you select Email Address, enter the relevant email addresses that would be permitted to send invoices to the Bulk OCR. For example, if “planmanager@mypcorp.com” was entered, then only invoices sent through from that address would be accepted by the Bulk OCR function and would create a claim.
- Next, copy the Bulk OCR email address that appears to the right of your whitelist settings using the Copy icon. Save all GENIUS Settings.
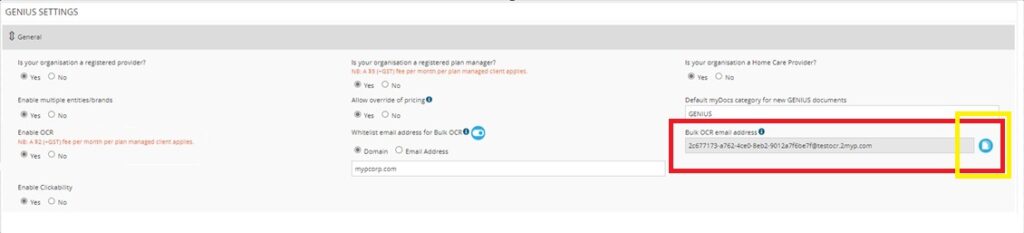
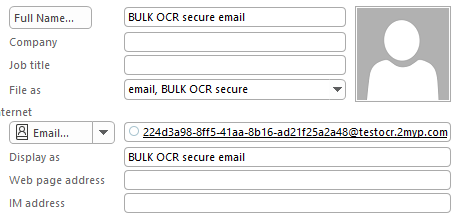
- Go to your Email Account/Client (e.g. Outlook, Gmail etc.) and Save the Bulk OCR email address as a new contact to your Global Address book. Consider a naming convention that makes it easy to identify for staff. Below is an example from Outlook, please note this will look different on other email platforms.
- The functionality is now ready for use.
Sending Invoices to the Bulk OCR Function
- Locate a new invoice and send it to the Bulk OCR email address using your email client.
- Please note, OCR will only read PDF attachments from the email.
- Within minutes invoices will be ready and waiting in the MYP platform for you to process.
- If the system fails to recognise an attachment or identifies an error, the platform will email you with the details of what has caused the error.
Processing Claims from the Bulk OCR Function
- Navigate to the Plan Managed Claim tab in the GENIUS Claiming Panel

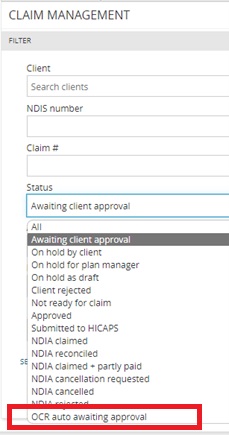
- Use the Filter icon and select the “OCR Auto Awaiting Approval” status. Note when this status is selected, the Service Start and End Dates will be cleared and are no longer a mandatory filter. It would be advisable to leave these empty so the plan manager is able to see any Bulk OCR claims that do not have dates applied.
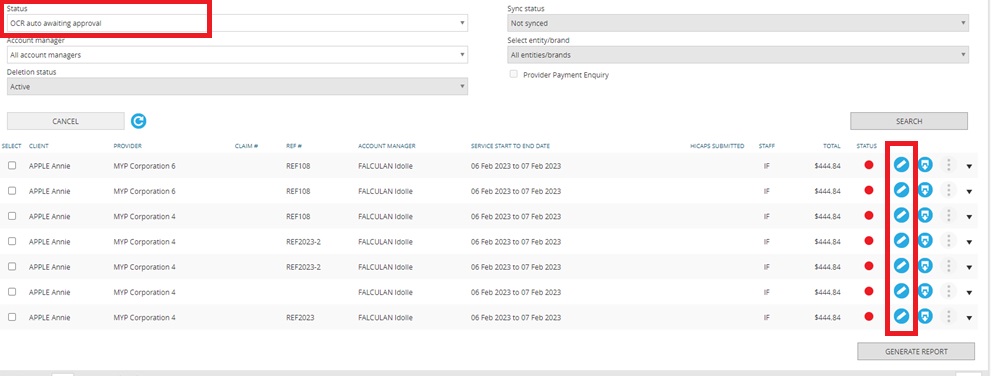
- Once you have searched this filter, any invoices that have been sent through the Bulk OCR function will be ready to process as a claim. Select the Edit icon to review a claim, make any adjustments as appropriate then Save and Approve the claim as per your usual process.
- Please note, the Bulk OCR function has designed to guide the plan manager to open each individual claim and review it before performing an approval or hold. This is to ensure that all mandatory fields have been populated and for the plan manager to ensure due diligence is completed on processing invoices.
- When you open up each Bulk OCR invoice/claim, the notes section will indicate the source whitelisted email, the date and time that it was sent to be processed and the subject line of the email.
- All other features and functions are those of a newly created claim and you should follow your existing claim processing workflows.
- After processing an invoice you will be returned to the “OCR auto awaiting approval” list to process your next invoice.
Frequently Asked Questions
Q: I sent an invoice to the bulk OCR email address, but I’m unable to find the corresponding claims in the “Plan managed claim to NDIA” tab. What might be the reason for this?
- The user might have not whitelisted the email address/domain they are forwarding the provider invoice from. If the user has not whitelisted the email address/domain [Refer to step 3 in the instructions]. this can often happen when they have multiple inboxes set up in their email (ie work email and accounts email) they may have sent it from the wrong email address.
- The user might have sent a duplicate invoice, meaning a claim exists in genius for the invoice. Please check for any bounce back email from Genius, this would sit as a conversation in the user’s outlook.
- The user might have attached a file that is not a pdf. Bulk OCR will only process PDF. Please check for any bounce back email from Genius, this would sit as a conversation in the user’s outlook.
- The user might have sent a zero-size pdf (this would be a rare scenario), or a file that is not a pdf, but named as a “.pdf” file. Please check for any bounce back email from Genius, this would sit as a conversation in the user’s outlook.
- There might have been a technical failure in the process of the creation of the claim. This could because of myriad of reasons, like Sypht may be down, or the application was not able to save the invoice file into myDocs. In this case, the user would need to create the claim manually and perform a Run-OCR. Please check for any bounce back email from Genius, this would sit as a conversation in the user’s outlook.
Q: I am unable to find my Bulk OCR claims (Status = OCR Auto Awaiting Approval) when I use the All status filter. Why?
The Bulk OCR claims are actually created as a ‘pre-claim’, meaning it’s not officially a claim in GENIUS, so you won’t be able to locate it amongst your other claims. You need to use the specifically designated OCR Auto Awaiting Approval status, then action the ‘pre-claim, either by approving it or putting it on hold. It would then be located in the respective, Approved or On Hold statuses.
Q: I noticed that when I set the status to “OCR Auto Awaiting Approval”, the service dates in the filter panel goes blank, is it broken?
This has been designed specifically. Certain provider invoices may only contain one date, and in these cases, Sypht (the scanning technology) might not return any date or return this date as either the start or end date for the claim. With a claim, as the start and end date are mandatory, to ensure none of your claims are missed, we removed the necessity to have a date when creating these initial pre-claims. Please note, the start and end date filter are still usable, the user will need to set the dates in the filters.
Q: I accidentally created duplicate claims; I forwarded the provider invoice and accidentally simultaneously manually created a claim with the same invoice. What do I do?
This would be rare as the system will often flag duplicate reference numbers from the same provider as a validation check but if this does occur, simply delete one of the claims as per the usual process.

Q: How do i know when a certain pre-claim was created and who sent the invoice through to the Bulk OCR function?
The note section the claim will indicate which email address the invoice was sent from, at what time and date it was sent and what the subject of the email was.
Q: I keep getting messages like this when I auto-forward emails from a particular address/domain to the Bulk OCR email address. Why is this happening?
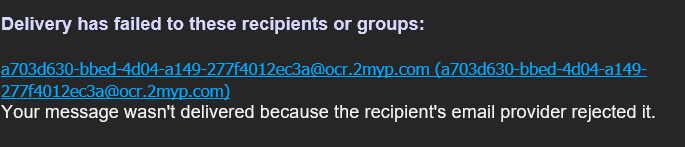
This might be due to the user’s organisation has some rules preventing the bulk auto forwarding of emails. In some cases, this is a security measure to protect company information. This will need to be addressed by the organisation’s IT Administrator.