Sync contact panel with client panel
In the community sector specifically the Client is the contact. Specific fields can be synced from the contact panel to the client panel to negate duplication of data. The following fields are duplicated and stay in sync when the sync icon is chosen:
- Home address – Street address
- Home Suburb – Suburb
- Home Town/City – Town/City
- Home State – State
- Home Post/Zip – Post/Zip
- Home country – Country
- Phone 1 – Phone 1
- Postal address if different
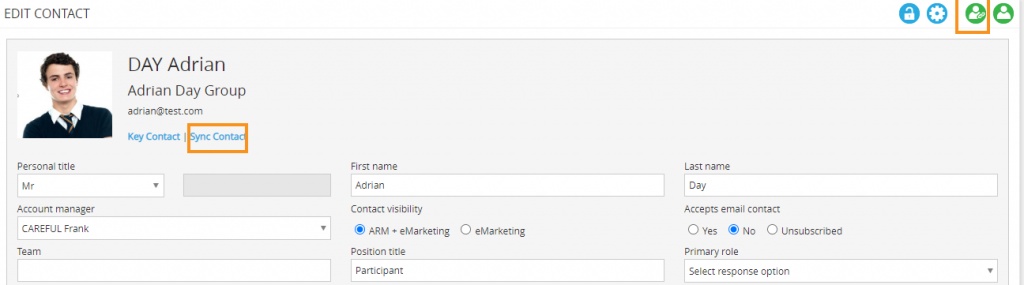
To sync key fields from the contact panel to the client panel:
- Identify the relevant client via search
- Select ‘Contacts’
- Identify the relevant contact
- Select ‘Edit’
- Select ‘Sync contact’
- Icon will turn green on sync
Copy + sync client contact
A contact from one client can be copied to other clients.
To copy a contact:
- Identify the relevant client via search
- Select ‘Contacts’
- Identify the relevant contact and select ‘Copy’
- Select the fields to be copied from the list of fields – ARM Pro can select multiple fields, ARM can only select the ‘Contact history notes’ field.
- Search for + select the client from the drop-down menu
- Select ‘Add’
- Repeat the process for each client the contact is to be copied to
- To synchronise fields for this contact across all of the clients, select the ‘Yes’ radio button beside ‘Synchronise fields’
The ‘Copy’ button is only visible if the duplicate email addresses setting is set to ‘Yes’:
- Select ‘Customisation’ from the side navigation
- Select ‘Settings’
- Select ‘Yes’ for ‘CONTACTS – Duplicate email addresses’
The ‘Edit’ button links to the edit page for the contact in the corresponding client, the ‘Archive’ button will archive the contact in the corresponding client.
The ‘Disconnect’ button removes the link between the current contact and the copied contact but preserves the actual contact in the client to which it was copied.
NB: In addition to the copying of contacts, notes can be added across all connected copies of a contact by selecting the ‘Add note to all contact copies’ radio button in the edit page.
NB: Public notes/notifications visible to all task members. Internal notes/notifications visible only to internal staff.