Create tasks
The ARM module provides an efficient means to create and manage tasks for each project. Once the project information has been entered:
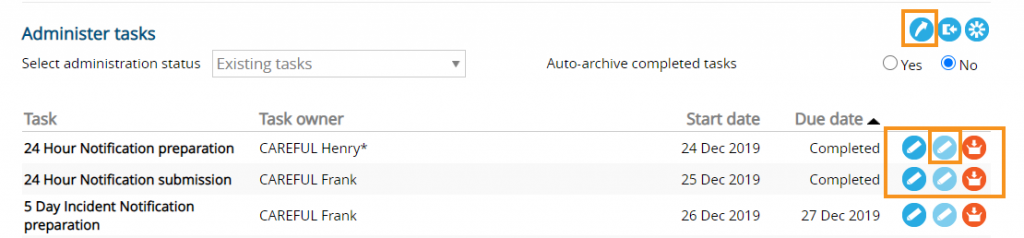
- Select ‘Create project task’ beside ‘Administer tasks’ to create a task
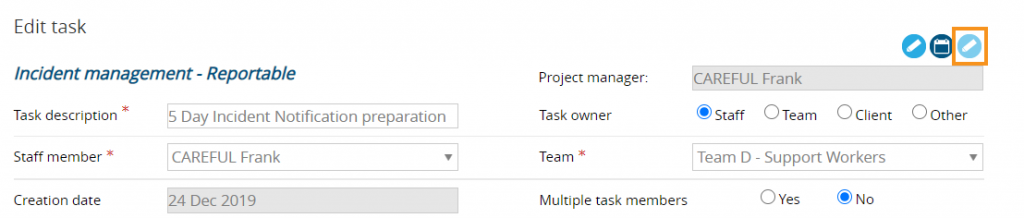
- Enter task description
- Select the task owner
The four options for task owner include the following:
- Staff – select the relevant staff member from the drop-down menu
- Team – select the relevant team from the drop-down menu
- Client – select the relevant client staff member from the drop-down menu (as listed in ARM)
- Other – enter the name of the client (as listed in ARM), then select the client staff member from the drop-down menu (as listed in ARM)
- Select whether the task will have multiple task members. Selecting ‘Yes’ will add two new buttons. Clicking the ‘Edit’ button will produce a pop-up where task members (both staff members and client contacts) can be added or removed. Select ‘Save’. Clicking the ‘View’ button will produce a pop-up list of all task members. Select ‘Finish’. (An asterisk displays next to the task owner on the project page to denote tasks which have multiple task members.)
- Add relevant dates (start date, reminder date, due date etc). Select the relevant reminders + notifications as required
- If the project task is to be repeated, select the ‘Yes’ radio button for project task recurrence
- Select recurring frequency and dates in the pop-up + select ‘Save’
- To send the task as a calendar item to the current user’s email address, click the ‘Add task to calendar’ button beside ‘Edit task’
- To re-assign a task to another client +/or project, click the edit button beside ‘Edit task’
- Select the ‘Client’ and ‘Project’ from the drop-down lists in the pop-up box
- To re-assign a task to a staff member without being linked to a project or client, select ‘No client’ + ‘No project’ in the pop-up box. Select ‘Confirm’
- Select ‘Save’
NB: Tasks will only recur until the parent project is completed. If a recurring project has a repeating task, only the most recent copy of that task will be copied to the new project. The old project or task will automatically archive on repeat if it has been completed.
Notifications from the task will be sent by email to the selected recipients when a document is uploaded (myDocs users), a note is added or when ‘Save’ is clicked.
Project tasks also operate in the same manner as the support module. i.e. The relevant party is notified when updates to notes are made, documents are attached or the completion date is selected.
Project tasks can be assigned to clients. In these instances, notification and reminder emails sent to the client will contain a link to that task, but most fields will not be available for the client to edit. Once the task has been completed by the client and the completion date selected, the client will no longer be able to access this task page.
Automated reminder emails will be sent each day to task owners, members and PM as selected, who have tasks with overdue dates assigned for follow up. These emails will list all tasks that are due for action prior to, and including that day’s date. These emails can be stopped by removing the reminder and due dates from the project task.
Project tasks can be set to archive automatically on completion. Selecting ‘Yes’ will automatically archive tasks once a completion date is assigned. Existing completed tasks will not be affected and will need to be archived manually.

Tasks not associated with a project can only be assigned to staff members and can only be accessed by the task owner. Since these tasks are not linked to a project or client business, they cannot be viewed in the traditional way through the parent project’s list of tasks. They are accessed via the ‘My to-do list’ page.
Create sub-tasks
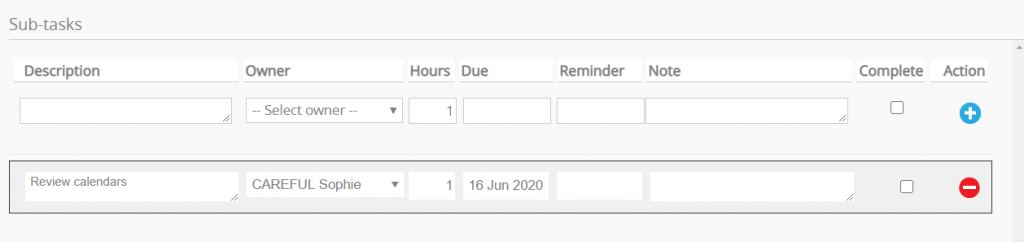
Each project task can have its own set of sub-tasks. These can be created/edited on the ‘Edit project’ page by clicking on the sub-task button.
A pop-up window is displayed where sub-tasks can be added by completing the fields and clicking the ‘Add sub-task’ button. They can be re-ordered by dragging and dropping, or deleted by clicking the ‘Delete sub-task’ button.
The sub-task pop-up can also be accessed from the ‘Edit task’ page:
The following symbols ]\”‘< will not display in the gantt chart so it is recommended that they not be used in project task descriptions.
Tasks can be re-assigned within a project from one staff member to another.
Selecting the ‘re-assign’ button will open a pop-up.
Tasks can be re-assigned from multiple staff members at once.

Tasks are re-assigned once ‘Confirm’ is selected.
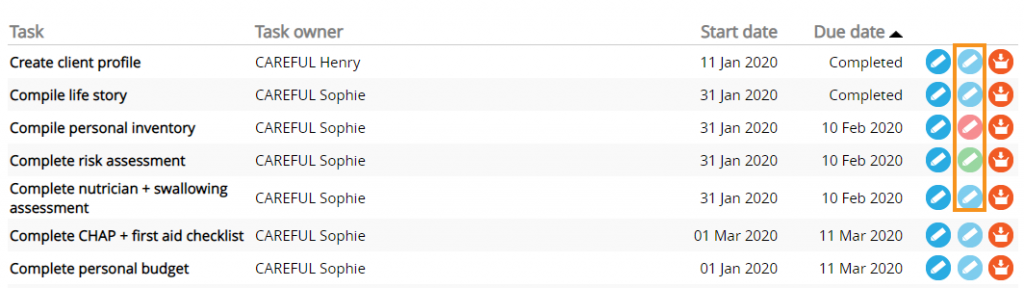
Sub-tasks are colour-coded to reflect their status:
 |
Add sub-task |
 |
Edit sub-tasks (if a sub-task is incomplete) |
 |
Edit sub-tasks (if all sub-tasks are completed) |
Importing project tasks from spreadsheet
Project tasks can also be imported from a spreadsheet.
- Select the ‘Import project task’ button beside ‘Administer tasks’
- Select ‘Download’. It is critical that you read + understand all of the upload functionality listed on the task upload web page
- Fill in the spreadsheet with the project task information
- Select ‘Choose file’ to upload the tasks to the project
NB: When importing a series of tasks to a project, please note:
- Only one of the following three fields should be filled in per task:
- Project task staff member
- Project task client contact
- If more than one of these fields are filled in for a single task, the system defaults to the left-most field for task ownership
- Filling in the project task completion date field will mark the task as completed. If the goal is to not import the task as completed, then leave this field blank
- Fields that can take multiple staff names (Project task multiple task members) need to be separated by semicolons
- The project task notifications to field can take any combination of the three options in the sample, separated by semicolons
- The contents of the notes field are added to the task as a note
Manage project task dependencies (ARM Pro only)
ARM Pro provides the ability to set dependencies for project tasks – e.g. task 1 must be completed before task 2 commences. To create task dependencies once project tasks have been created:
- Select the ‘Yes’ radio button beside ‘Use task dependencies’
- The page will refresh, then select ‘Create’ beside ‘Task dependencies’
- Select the first task from the drop-down menu
- Select the condition from the drop-down menu
- Select the second task from the drop-down menu
- Select ‘Save’
Task dependencies can only be created if the task dates are created with the correct chronological sequence. Pop-up warning messages will appear if the selected dates are inconsistent with the dependencies.
When archived tasks are un-archived, previous dependencies between tasks may be inconsistent if the existing task dates have changed. The two options are to delete the dependency or change the task dates.
Administer project task groups (ARM Pro only)
ARM Pro Subscribers can group project tasks into groups for more efficient management and identification. These task groups can be created as part of a project template or in one-off projects. These groups (e.g. Pre-commencement, Construction + Project review) and the relevant tasks are displayed in a project gantt chart.
To create task groups in a project template or in one-off project:
- ‘Create’ or ‘edit’ a project template or project
- Select the ‘Yes’ radio button beside ‘Use task groups’
- Scroll down the page and beside ‘Task groups’ enter the name of a task group + select ‘Add’ (repeat as required for multiple task groups)
- When task groups have been completed, identify a relevant task to ‘create’ or ‘edit’ + select the appropriate task group from the drop-down menu at the bottom of the page
- Select ‘Save’