Customise standard project template
Project templates provide the ability to efficiently allocate projects and tasks to clients via the template, rather than create them individually each time. To create a custom project template:
- Select ‘Customisation
- Select ‘Project templates’
- Select ‘Create project template’
- Enter template and project names + assign a project manager from the staff drop-down
- Enter relevant due date interval
- How many days from the project start date will the project be due
- If the project is to recur, select the ‘Yes’ radio button for Project recurrence
- In the pop-up, select recurring frequency + number of days after the project start date that the recurrence should begin
- Select Team/s able to access project + associated history, select ‘save’
Create project tasks
- Select ‘Create project template task’ beside ‘Administer tasks’
- Enter task name, assign to staff, team or client
- Select whether the task will have multiple task members. Selecting ‘Yes’ will add two new buttons. Clicking the ‘Edit’ button will produce a pop-up where task members (both staff members + client contacts) can be added or removed. Select ‘Save’. Clicking the ‘View’ button will produce a pop-up list of all task members. Select ‘Finish’
- Enter task start interval
- How many days from the project start date will the task begin
- Enter task reminder interval
- How many days from the project start date will the task produce reminders
- Enter task due interval
- How many days from the project start date will the task be due
- Select relevant reminders + notifications
- If the task is to be repeated, select the ‘Yes’ radio button for Project task recurrence
- In the pop-up, select recurring frequency + number of days after the task start date that the recurrence should be set, select ‘Save’
- If required, enter notes to the project + tasks. These notes will automatically be added to the project + task history when created
- To enter a new task in between existing tasks, select the ‘Add’ icon
- Select ‘Save’
NB: Task notes text boxes will expand to fit content.
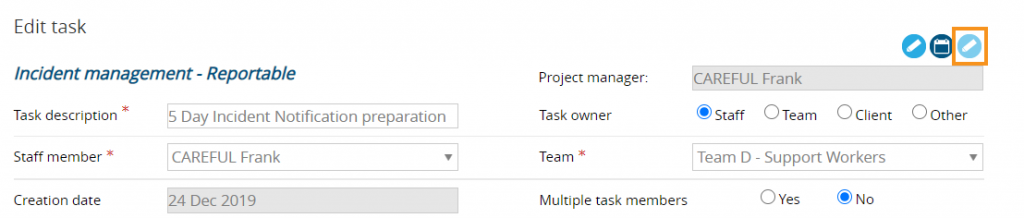
Create sub-tasks
Each project task can have its own set of sub-tasks. These can be created/edited on the ‘Edit project template’ page by clicking the sub-task button.
A pop-up window is displayed where sub-tasks can be added by completing the fields and clicking the ‘Add’ button. The main difference for sub-task templates is that the dates are now intervals and require an interval number instead of a date. Sub-tasks can be re-ordered by dragging and dropping, or deleted by clicking the ‘Delete’ button.
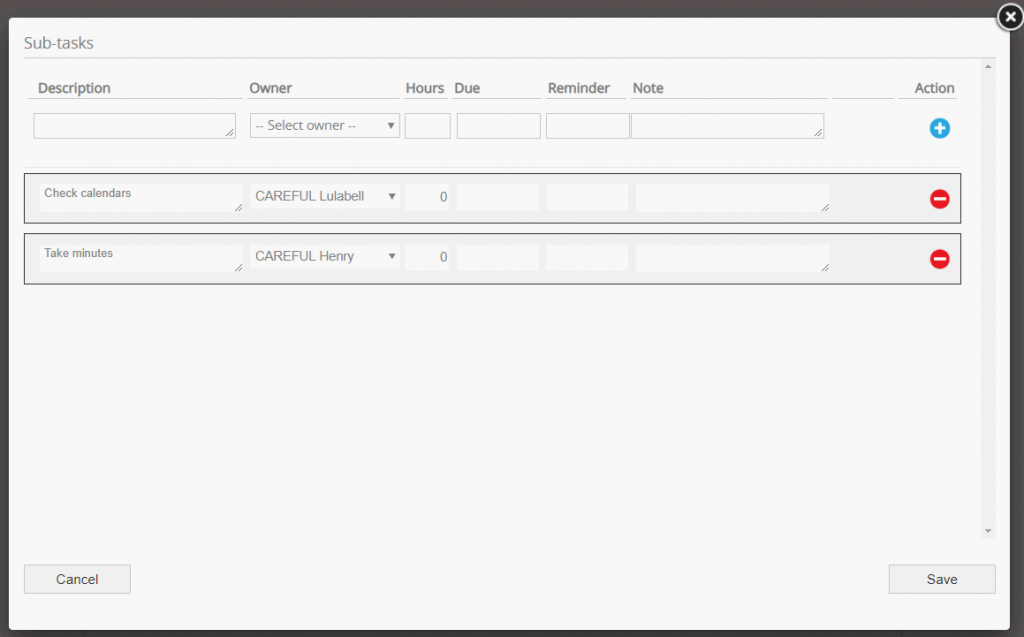
The template sub-task pop-up can also be accessed from the ‘Edit template task’ page.
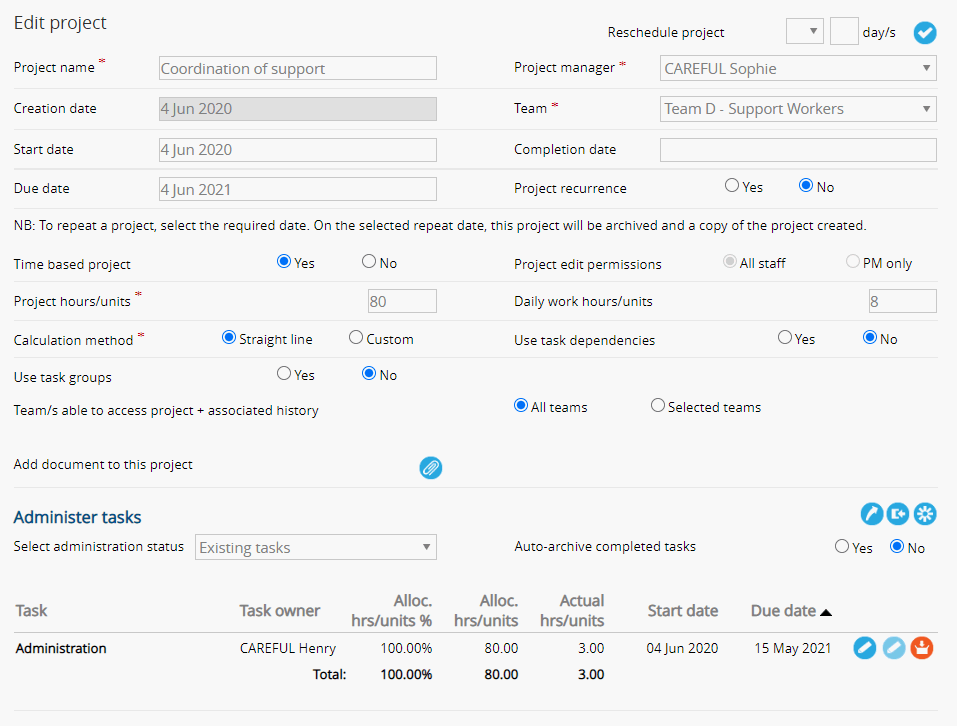
Customise project time management template (ARM Pro only)
ARM Pro provides a time management feature to allocate, record and report time based activities around projects and tasks.
- Select ‘Customisation’ from the side-navigation bar
- Select ‘Project templates’ to create a project template and add relevant tasks
- To customise a project select ‘Yes’
- Enter the number of allocated hours/units
- Select the allocation calculation method
- Straight line
- Custom value
- Custom %
The straight line calculation method will apply an equal allocation of time across all tasks. The custom allocation method allows for custom allocation of time (percentage/value) for each task. To create a new task for the project:
- Select ‘Create task’, enter details including a relevant percentage of project time
- Select ‘Save’
NB: Coordinators of support often use the project time management project to capture their notes for coordination of support and to create invoices from the reports. It is recommended that team permissions be switched on so that only the relevant team can see the history and project.
Import tasks from spreasheet
Project template tasks can also be imported from a spreadsheet.
- Select the ‘Import’ beside Administer tasks
- Select ‘Download’. It is critical that you read + understand all of the upload functionality listed on the task upload web page
- Fill in the spreadsheet with the project task information
- Select ‘Choose File’ to upload the tasks to the project