ARM Pro provides the ability to customise data fields within ARM on the clients, contacts, opportunities, opportunity tasks, projects, project template and project task pages.
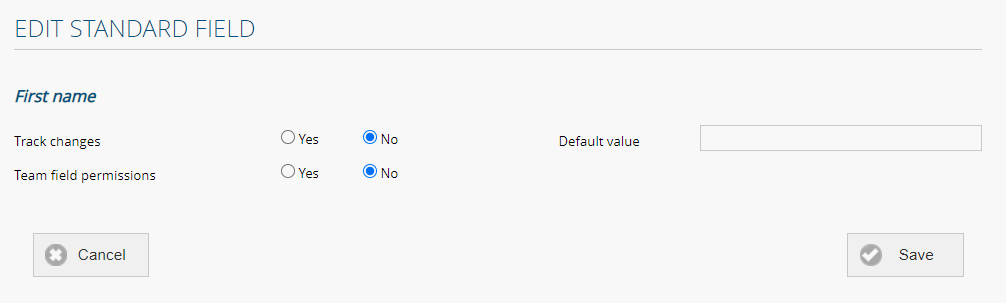
Edit standard fields
- Select ‘Customisation’ from the side navigation menu
- Select ‘Fields’
- Select the relevant category from the drop-down (e.g. client, contact, opportunity, project)
- Identify the relevant standard field + select ‘Edit’
- Select the ‘Track changes’ radio button to track changes (e.g. selecting this for the ‘Follow-up’ dates within opportunities or projects removes the ability for staff to change overdue follow-up dates to make them appear ‘on-track’ without being recorded in the ‘History)
NB: The editing of standard fields is limited to ‘Track changes’ and the setting of default values, except for the Demographic + Corporate Details fields which can be edited as below.
Fields in the Demographic + Corporate Details section of the client page can be set as required fields.
- Select ‘Yes’ beside ‘Team permissions’ to set permissions by team for the following abilities:
- Value not shown – not visible to this team
- Read only – response is visible but cannot be edited/changed
- Read + write – full access to edit/change
Standard fields can be archived if required. Selected fields cannot be archived if linked to opportunity or project tasks e.g. task due date.
Add custom sections
- Select ‘Customisation’ from the side navigation menu
- Select ‘Fields’
- Select the relevant category from the drop-down (e.g. client, contact, opportunity, project)
- Select ‘Create custom section’
- Enter section name
- Select ‘Confirm new section’
- Select ‘Save’
Administer custom sections
- Select ‘Customisation’ from the side navigation menu
- Select ‘Fields’
- Select the relevant category from the drop-down (e.g. client, contact, opportunity, project)
- Select ‘Edit custom section or ‘Archive’ as required
- Select ‘Save
Add custom fields
- Select ‘Customisation’ from the side navigation menu
- Select ‘Fields’
- Select the relevant category from the drop-down (e.g. client, contact, opportunity, project)
- Select ‘Create custom field’
- Enter field name
- Select field type from the drop-down (if ‘Drop-down’, ‘Multi-select’ or ‘List’ are selected, you will also need to ‘Customise’ or ‘Create’ the relevant responses by selecting the relevant button.)
- Select the relevant ‘Section’
- Select ‘Yes’ beside ‘Required field’ to make it a required field
- Select ‘Yes’ beside ‘Track changes’ to enable changes to be tracked in Client History + Contact History. These changes can also be generated in the ‘Track Changes Report’ (ARM Pro only).
- Select ‘Yes’ beside ‘Team permissions’ to set permissions by team for the following abilities:
- Value not shown – not visible to this team
- Read only – response is visible but cannot be edited/changed
- Read and write – full access to edit/change
- Select visible on
- Contacts
- Staff
- Contacts + staff
NB: ‘Staff’ can be selected as a custom field response type and the ability exists to select a default value for a response.
NB: ‘Hyperlinks’ can be selected as a custom field response type if links to other websites or documents are required. If a link is required to your local system (e.g. an archive folder on your server), the file path must be prefixed with ‘file://’ (e.g. file://myp.manuals.sample).
NB: Selecting the ‘List’ field type allows for a variety of options. For example, to create the option to provide 5 support tickets to a client and to remove them one at a time as they are used:
- Complete the above
- Select ‘Client’
- Enter ‘Support tickets available’ as the field name
- Select ‘List’ from the field type drop-down
- Select ‘Yes’ to allow duplicates (duplicate response types)
- Select ‘Create response’ + enter ‘Support’ as the response and select ‘Save’
- Select ‘Save’
- Identify the relevant client via search
- Select ‘Edit’
- Locate the custom field + select ‘Support’ from the response option drop-down + select ‘Add’. Repeat this step 3 times to create 3 tickets
- Selecting delete each time a support ticket is used will reduce the number available by one
Administer custom fields
To administer a custom field:
- Select ‘Administration’ from the side navigation menu
- Select ‘Custom fields’
- Identify the relevant custom field + select ‘Edit’
- Edit the relevant response option/s
- Select ‘Save
NB: Changing the field type will delete all responses set up for that field type, with the exception of changing between drop-down and radio button field types. A warning pop-up window will appear alerting the user.
NB: myDocs Subscribers have the ability to upload a document to the custom field by selecting the ‘Add’ button.
Edit + archive custom fields
- Select ‘Customisation’ from the side navigation menu
- Select ‘Custom fields’
- Select ‘Edit custom field’ or ‘Archive’ as required
- Select ‘Save
Change default birthday notification period
In the ARM ‘Contacts’ page, the ability exists to add the client’s birthday and to notify the Account Manager of the birthday.
NB: The Account Manager could be the HR Manager or the staff member’s immediate manager.
The default setting is set to 2 business days prior to the birthday but this can be changed by ARM Pro users.
To change the default setting:
- Select ‘Customisation’ from the side navigation menu
- Select ‘Fields’
- Select ‘Contact’ from the drop-down
- Select ‘Edit’ beside the ‘Birthday reminder to account manager’ field
- If required, select a new default value
- Enter the number of business days for notification
- Select ‘Save’
Add documents to custom fields
Subscribers to both ARM Pro and myDocs have the ability to add documents to custom fields. To add a document to a custom field:
- Select ‘Customisation’ from the side navigation menu
- Select ‘Fields’
- Create a new custom field or edit an existing custom field
- Create a new custom field response or edit an existing custom field response
- To add a document, select ‘Add’
- Select ‘Save’
Set field security permissions
ARM Pro provides the ability to set security permissions to standard and custom fields. These permissions are allocated by team. To set security permissions by team:
- Select ‘Customisation’ from the side navigation menu
- Select ‘Fields’
- Select the required category from the drop-down
- Identify the relevant field + select ‘Edit custom field’
- Select ‘Yes’ beside ‘Team Permissions’
- Allocate the appropriate permissions
- ‘Value not shown’ – team members with this permission will not be able to see the responses, it will appear blank
- ‘Read only’ – team members with this permission will be able to see the response but will not be able to add or edit the response
- ‘Read and write’ – only team members with this permission will be able to read, add + edit a response
- Select ‘Save’