By default, emails sent from your MYP subscription (such as eMarketing campaigns and Communication Centre communications) will come from info@1myp.com. This email address can be changed for each brand in your subscription, and there are two customisation options:
- Custom prefix on the MYP domain (e.g. example@1myp.com and ourorganisation@1myp.com)
- Custom prefix on a custom domain (e.g. hello@example.org and info@example.org)
The email address is customised in ARM Pro > Customisation > Brand, style + shortcuts. The sections below explain how to set up a custom prefix on the MYP domain and a custom prefix on your own domain.
Standard email address
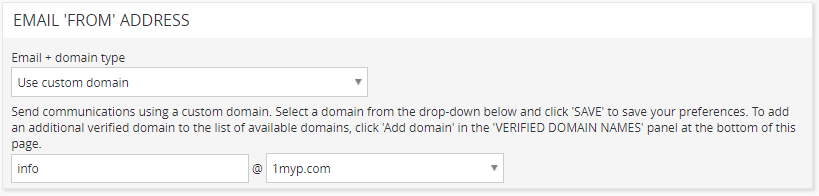
To send from info@1myp.com:
- Edit your brand
- Select ‘Use default MYP address’ from the ‘Email + domain type’ drop-down.

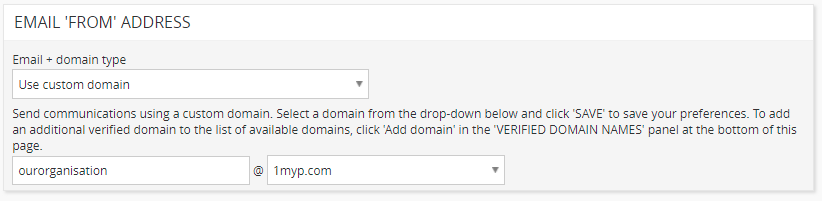
Custom prefix on the MYP domain
To send from a custom prefix on the MYP domain (such as ourorganisation@1myp.com):
- Edit your brand
- Select ‘Use custom domain’ from the ‘Email + domain type’ drop-down
- In the first text field, enter your desired prefix (this will most likely be your organisation’s name)
- Select ‘SAVE’
Custom prefix on a custom domain
To send from a custom prefix on a custom domain (such as info@example.org), you will need some technical knowledge and access to your domain name’s DNS settings. There are multiple steps to getting set up:
1. Authenticate custom domain
In the ‘VERIFIED DOMAINS’ panel:
- Select ‘Add domain’
- Enter your domain in the ‘Step 1: authenticate your domain’ field
- Select ‘Authenticate domain’
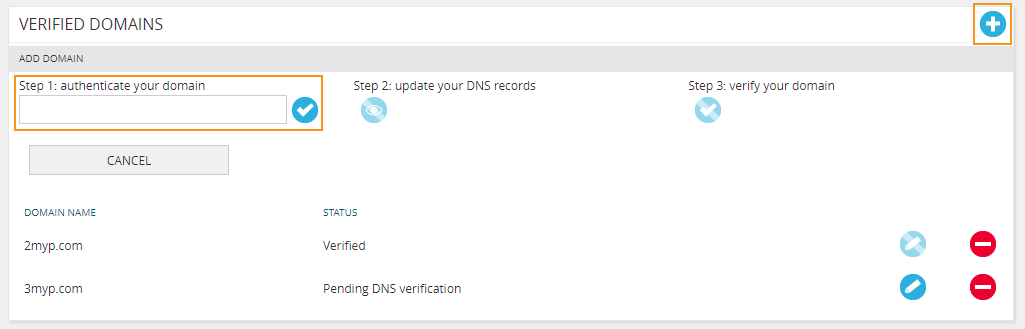
NB: Include only the domain name that you want to send the email from (e.g. example.org), do not add any additional prefixes (e.g. www.example.org or http://example.org).
2. Update DNS records
Once authenticated in the ‘VERIFIED DOMAINS’ panel:
- Select ‘View instructions’
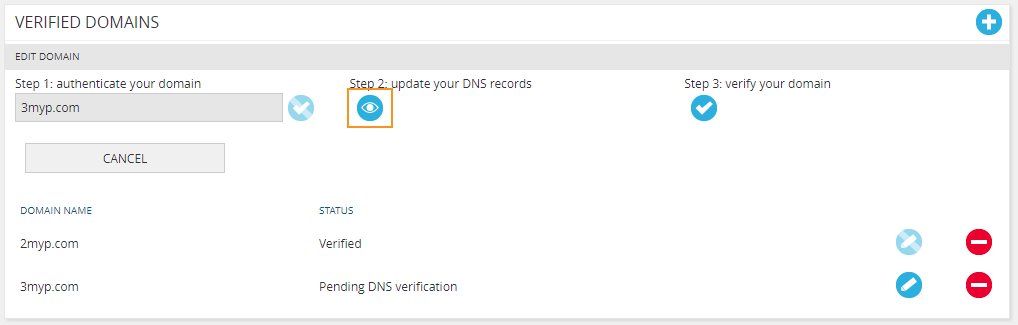
A pop-up will display with the CNAME records that will need to be added to your domain’s DNS host.
Your DNS host is most likely combined with your domain name registration or website hosting. Each DNS host is set up differently, so the following steps may vary slightly:
- Log in to your DNS host (e.g. GoDaddy, VentraIP, CrazyDomains, Digital Pacific, etc)
- Navigate to DNS management (may also be called ‘DNS zone editor’)
- For each record in the ‘Update your DNS records’ MYP pop-up:
- Create a new record (may also be called ‘DNS record’ or ‘zone record’)
- Select ‘CNAME’ as the record type
- Copy the text in the ‘ZONE NAME’ column in MYP and paste it in the ‘Name’ field in your DNS management
- Copy the text in the ‘VALUE’ column in MYP and paste it in the ‘Value’ field in your DNS management (may also be called ‘Record’, ‘Target’, ‘Data’ or ‘Content’)
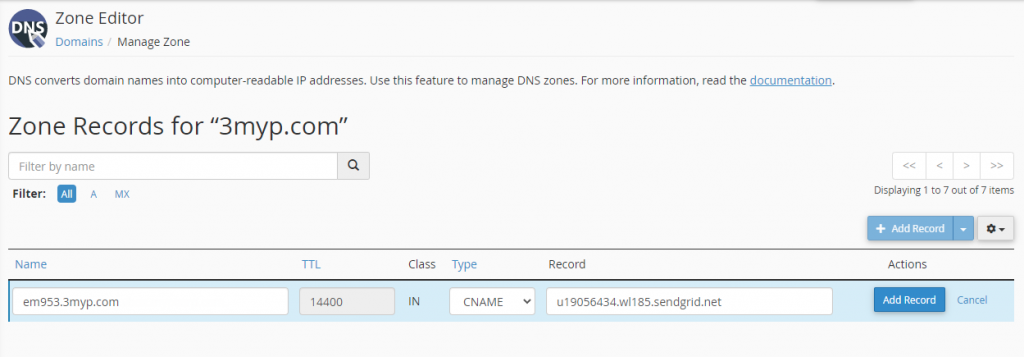
- Save the changes in your DNS management
- Update your SPF records to include your custom domain
NB: Updates to your DNS may take 24 – 48hrs to take effect.
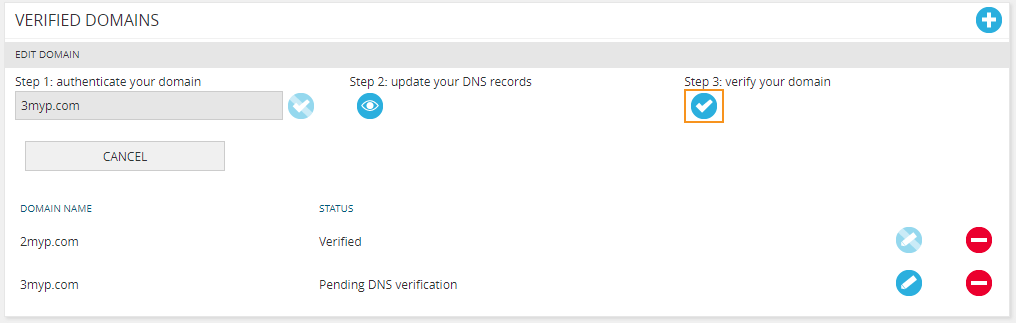
3. Verify custom domain
After 48hrs have passed, return to the ‘CUSTOMISE BRAND + STYLE’ page in MYP:
- Select ‘Edit domain’ on the domain you recently created
- Select ‘Verify domain’
- The domain will be verified.
If there was an issue verifying the domain, check that the DNS records were copied into your DNS host correctly. If they are correct, ensure that you have waited at least 48hrs and try again.
4. Enable custom domain
Once the domain is verified, it is ready to be used:
- Edit your brand
- Select ‘Use custom domain’ from the ‘Email + domain type’ drop-down
- In the first text field, enter your desired prefix (such as ‘marketing’ or ‘info’)
- In the drop-down, select the domain you verified
- Select ‘SAVE’