94six has a series of settings and categories that are applied throughout in relation to:
- General
- Leave
- Payroll
- Performance reviews
- Public holidays
- Certification/qualification notifications
- Entities
- Training
- Document templates
Access general settings
To access ‘General’ settings:
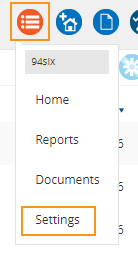
- Select 94six > Settings from the side navigation menu or from the ‘94six Navigation’ icon
- Select ‘General’
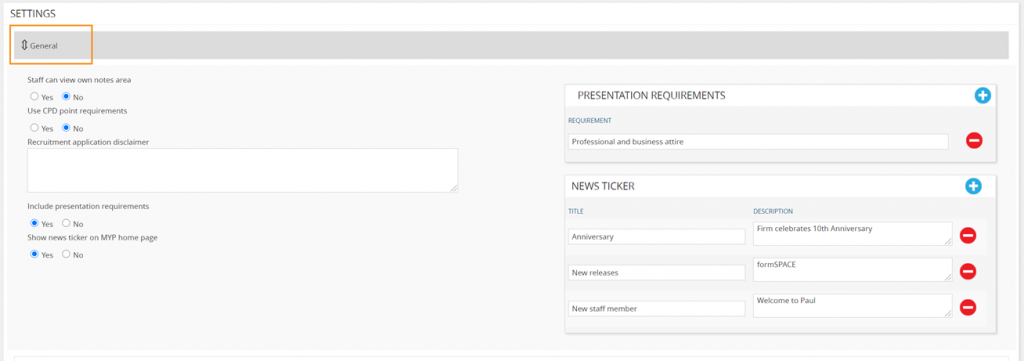
- Select ‘Staff can view own notes area’
- The notes area is a section of a staff members profile where disciplinary, recognition + other notes can be captured. This is defaulted to ‘No’ and is by default only accessible to managers only. When set to ‘Yes’, staff can see notes kept in this area.
- Select ‘Use CPD point requirements’
- For use with advisory businesses only.
- Enter ‘Recruitment application disclaimer’
- Enter a statement to be included for recruitment processes
- Select ‘Include presentation requirements’
- Creates a presentation requirements option
- To add a personal requirement, select the ‘Add’ icon
- To remove a personal requirement, select the ‘Remove’ icon
- Select ‘Show news ticker on MYP home page’
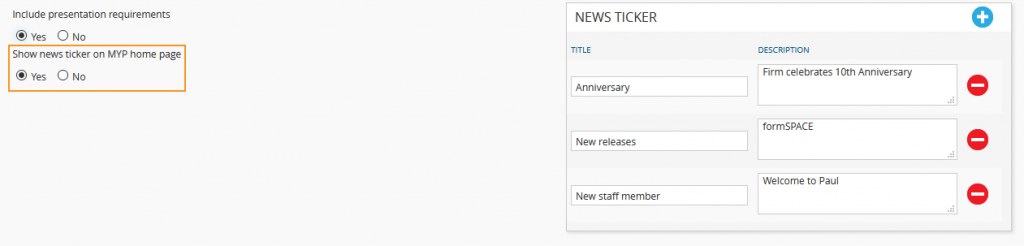
- To enter a news ticker item, select the ‘Add’ icon
- Enter ‘Name’ + ‘Description’
- To remove a news ticker item, select the ‘Remove’ icon
Ticker displays on the front of the MYP application upon log in and will cycle through each ticker item from the setting.
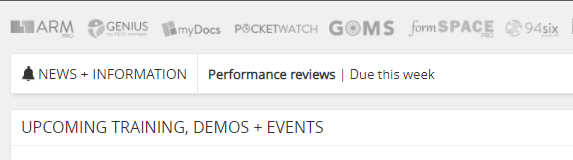
Staff have the option of removing the ticker by selecting the cross.
NB: The ticker will return on each log in.
- Select ‘Save’ or ‘Save + close’
Access leave settings
To access ‘Leave’ settings:
- Select 94six > Settings from the side navigation menu or from the ‘94six Navigation’ icon
- Select ‘Leave’

Once created, these leave types form the drop-down menus in the leave component of 94six.
Add leave profile
To add a leave profile:
- Select ‘Add profile’
- Select ‘Edit profile name’
- Enter profile name
- Select ‘Apply change’
- Enter ‘Annual leave days’
- Enter ‘Personal leave days’
- Enter ‘Maximum hours in pay cycle for which leave is accrued’
- Select ‘Leave approval’ – settings to determine how leave is approved
- Approved by payroll, then manager
- Approved by manager
- Approved by manager, then executive manager
- Approved by payroll, manager, then executive manager
- Approved by selected staff
- Approved by executive manager
- Select staff to approve leave (one staff member to approve)
- Click to choose a file or drag a file to upload leave policy document
- Select ‘Enable staff to cash out leave’
- Select ‘Include weekends in leave calculation’
- Select ‘Enable cost centre’
- Select ‘Enable covering staff field in applications’
- Select ‘Include details section in final ‘Leave approval’ email’
- Select ‘Notification to payroll on leave approval’
- Select ‘Enable long service leave’
- Enter ‘Period of employment (in years) after which long service leave is applicable’
- Enter ‘Accrued Long Service Leave (LSL) Hours when LSL is applicable’
- Select ‘Enable shift to leave’
NB: Shift to leave allows staff members to accrue leave based off the hours that they have worked (via approved PocketWatch timesheets).
- Select ‘Enable time off in lieu’
- Select ‘Enable TOIL calculation’
- Enter leave types
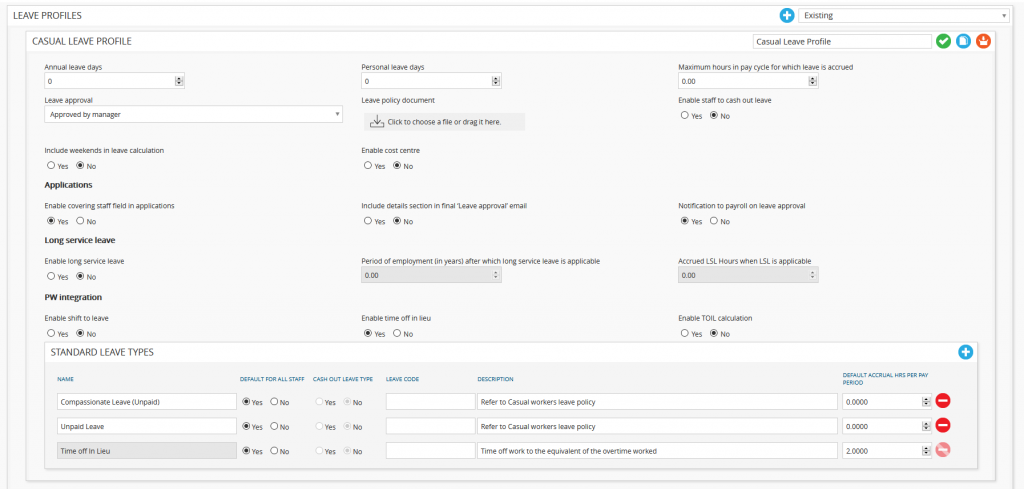
Add leave type
To create a leave type:
- Select the ‘Add’ icon
- Enter ‘Leave type name’
- Select ‘Default for all staff’
- Select ‘Cash out leave type’
- Enter ‘Leave code’
- Enter ‘Descriptions’
- Enter ‘Default accrual hour per pay period’
- Select ‘Save’ or ‘Save + close’
Leave profiles can be edited copied or archived by selecting the relevant icon.
Access payroll settings
To access ‘Payroll’ settings:
- Select 94six > Settings from the side navigation menu or from the ‘94six Navigation’ icon
- Select ‘Payroll’
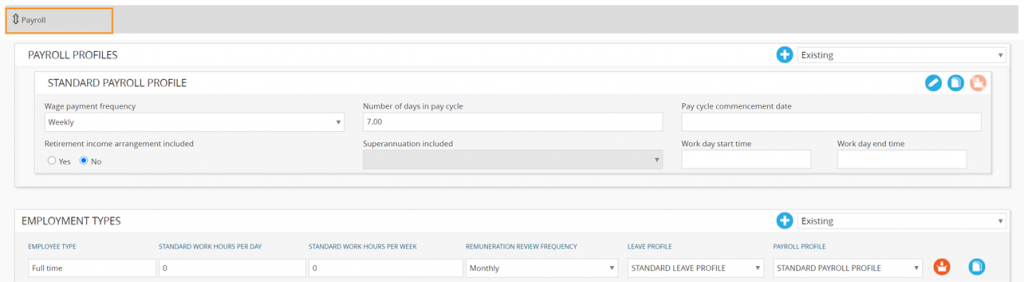
Add payroll profile
To add a payroll profile:
- Select ‘Add profile’
- Select ‘Edit profile name’
- Enter profile name
- Select ‘Apply change’
- Select ‘Wage payment frequency’
- Enter ‘Number of days in pay cycle’
- Enter ‘Pay cycle commencement date’
- Select ‘Retirement income arrangement included’
- Select ‘Retirement income arrangement type’
- Select ‘Superannuation included’
- Base plus super
- Base including super
- Select ‘Work day start time’
- Select ‘Work day end time’
Payroll profiles can be edited, copied or archived by selecting the relevant icon.
NB: Payroll profiles can only be archived when not in use.
Edit employment types
The employment type table allows an organisation to customise to reflect their requirements. It is recommended that any unused employment types be archived.
The following standard employee types are available:
- Full time
- Permanent
- Part time
- Casual
- Temporary
- Fixed Team
- Contract
- Volunteer
The following details can be edited:
- Standard work hours per day
- Standard work hours per week
- Remuneration review frequency
- Monthly
- Bi-monthly
- Quarterly
- Half yearly
- Yearly
- Leave profile – Leave profiles are created + adjusted in a separate setting
- Payroll profile
Access performance review settings
To access ‘Performance reviews’ settings:
- Select 94six > Settings from the side navigation menu or from the ‘94six Navigation’ icon
- Select ‘Performance reviews’
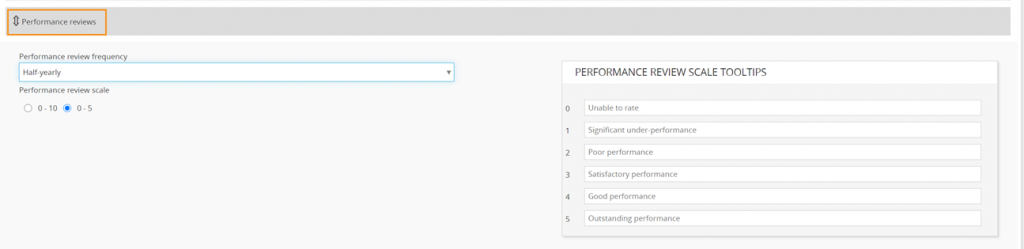
- Enter ‘Performance review frequency’
NB: This will reflect in custom and standard reports and settings.
- Select ‘Performance review scale’
- Performance review tooltips – creating/editing these items will replace the default descriptors on the sliders in the Performance Review section of 94six
Default descriptions are as follows:
| 0 – 5 scale descriptions |
0 – 10 scale descriptions |
| 0 |
Unable to rate |
0 |
Unable to rate |
| 1 |
Significant under-performance |
1 |
Extreme under-performance |
| 2 |
Poor performance |
2 |
Significant under-performance |
| 3 |
Satisfactory performance |
3 |
Under-performance |
| 4 |
Good performance |
4 |
Poor performance |
| 5 |
Outstanding performance |
5 |
Mediocre performance |
|
|
6 |
Satisfactory performance |
|
|
7 |
Good performance |
|
|
8 |
Very good performance |
|
|
9 |
Outstanding performance |
|
|
10 |
Exceptional performance |
Default descriptions can be deleted and updated.
- Select ‘Save’ or ‘ Save + close’
Access public holiday settings
To access ‘Public holiday’ settings:
- Select 94six > Settings from the side navigation menu or from the ‘94six Navigation’ icon
- Select ‘Public holidays’
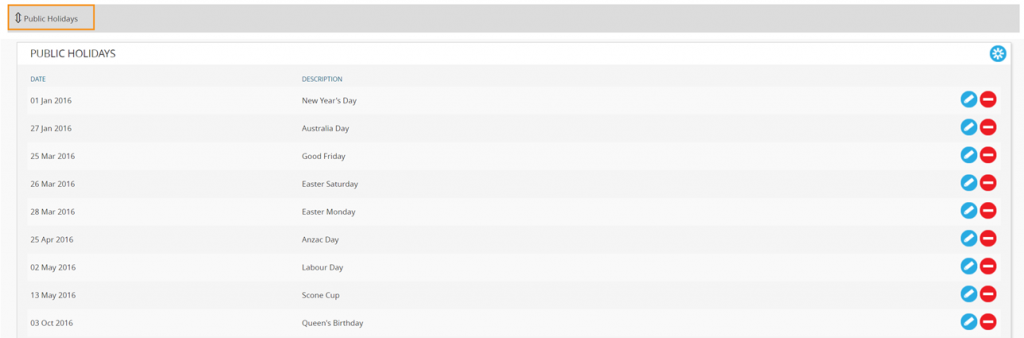
This page utilises the same fields for public holiday settings in PocketWatch. Any changes stay in sync.
To create a public holiday:
- Select ‘Create’
- Enter ‘Name’
- Select ‘Start date’
- Select ‘Start time’
- Select ‘End date’
- Select ‘End time’
- Select ‘Recurring holiday’ if relevant
- Select ‘Exempt from standard rate’ if relevant
- Select ‘Region’
- Select ‘Save’ or ‘Save + close’
Additional public holidays can be edited or archive by selecting the relevant icon.
Access certification/qualification notification settings
To access ‘Certification/qualification notifications’ settings:
- Select 94six > Settings from the side navigation menu or from the ‘94six Navigation’ icon
- Select ‘Certification/qualification notifications’
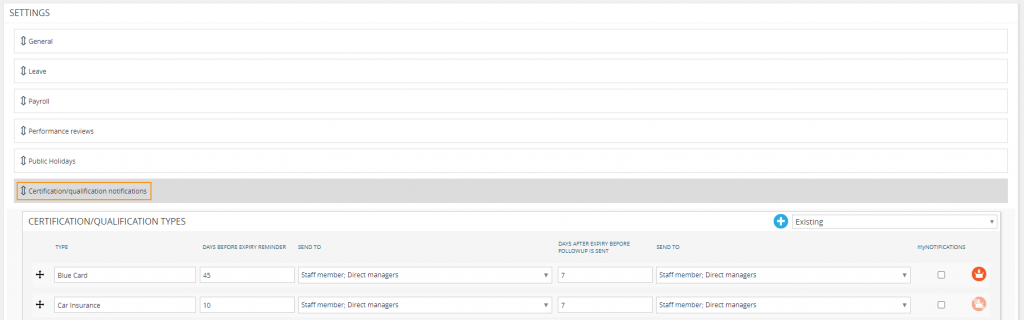
The information captured in the CERTIFICATION/QUALIFICATION TYPES table flows through the staff profile and then to the Information, actions and training panel.
- Select the ‘Add’ icon
- Enter ‘Type’
- Enter ‘Days before expiry reminder’
- Select recipients of the reminder
- Staff member
- Direct managers
- Executive managers
- More than one position may be applied
- Enter ‘Days before expiry follow up’
- Select recipients of the follow up
- Staff member
- Direct managers
- Executive managers
- More than one position may be applied
Notification emails are sent to remind staff Licence/Certifications are due to expire.

- Select ‘myNotifications’ if you would like the reminder and notification to go to one area.
- Certification/ Qualification types can be deleted by selecting the delete icon.
- Select ‘Save’ or ‘Save + close’
Access entities settings
To access ‘Entities’ settings:
- Select 94six > Settings from the side navigation menu or from the ‘94six Navigation’ icon
- Select ‘Entities’
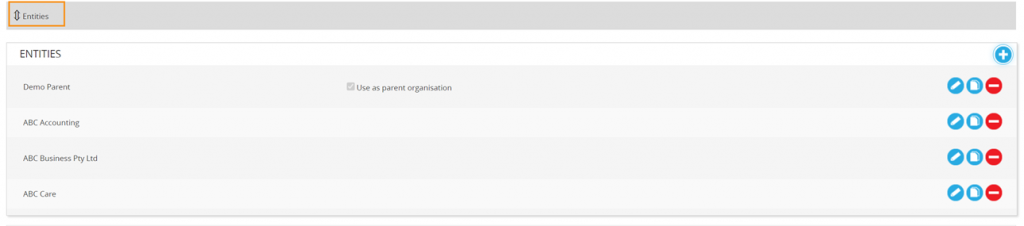
This section of 94six contains relevant organisational information which flows through to other parts of 94six. This critical organisation information needs to be created and administered by a select few with permission to do so. These settings create the capacity to enter corporate information to be included in a range of 94six documents and reports. 94six provides the ability to create entities within a corporate structure. These entities then form drop-down menu options for selection in other areas of 94six (e.g. position descriptions can be created for staff within an entity).
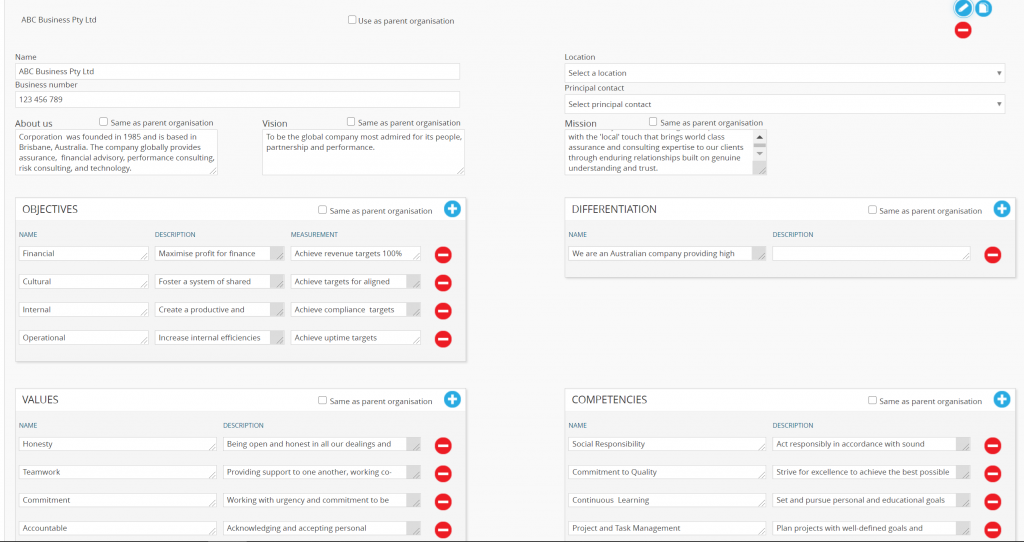
To enter entity information:
- Select the ‘Add’ icon
- Enter ‘Name’
- Select ‘Location’
- Enter ‘Business number’
- Select ‘Principal contact’
- Enter ‘About us’
- Enter ‘Vision’
- Enter ‘Mission’
- Enter ‘Objectives’
- Name
- Description
- Measurement
NB: The Corporate objectives flow through to individual position descriptions with an additional KPI section for each objective.
- Enter ‘Differentiation’
- Enter ‘Values’
- Enter ‘Competencies’
- Select ‘Save’ or ‘Save + close’
Additional entities can be added edited copied and removed from these panels by selecting the relevant icon.
NB: One entity must be chosen as the parent organisation.
Access training settings
To access ‘Training’ settings:
- Select 94six > Settings from the side navigation menu or from the ‘94six Navigation’ icon
- Select ‘Training’
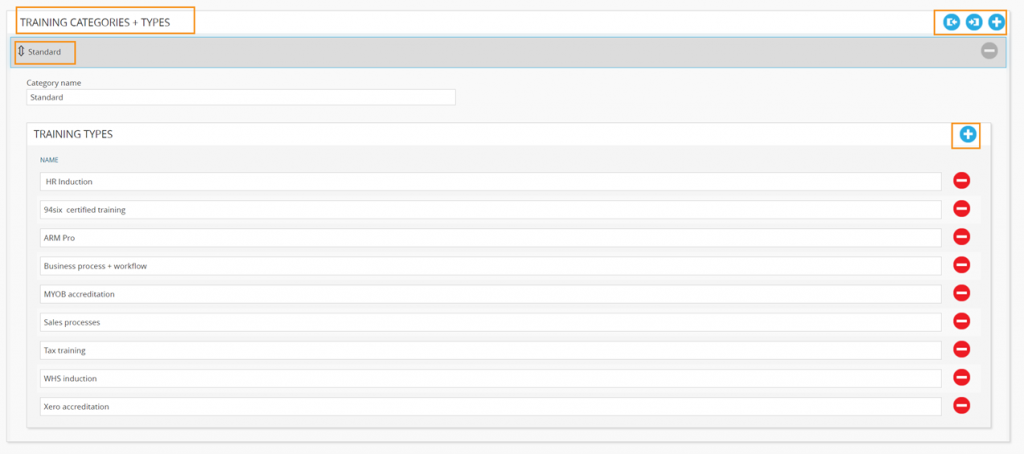
Customised training types can be created and edited to suit organisational requirements. Once created, these training types form the drop-down menus in other areas of 94six (e.g. performance reviews, staff training).
Create training category
To create a new training category type:
- Select the ‘Add’ icon
- Select ‘New training category’
- Enter ‘Category name’
- Select ‘Add’ to create the training type/s per category
- Select ‘Save’ or ‘Save + close’
Import/export training type
To download the spreadsheet in CSV format:
- Click the download button
- Paste training type information into the appropriate columns of the spreadsheet, ensuring all relevant columns are completed.
Content:
- Do not amend column headings or column order in any way
- Training categories are case-sensitive
Overwriting:
The import process will not overwrite existing training types. Training types in the spreadsheet with the same name as existing types will be created without modifying existing types.
- Upload completed spreadsheet
Browse for the completed spreadsheet file. Once selected it will automatically upload.
To export training types:
The import + export .CSV contains the following fields:
Access document template settings
To access ‘Document template’ settings:
- Select 94six > Settings from the side navigation menu or from the ‘94six Navigation’ icon
- Select ‘Document template’
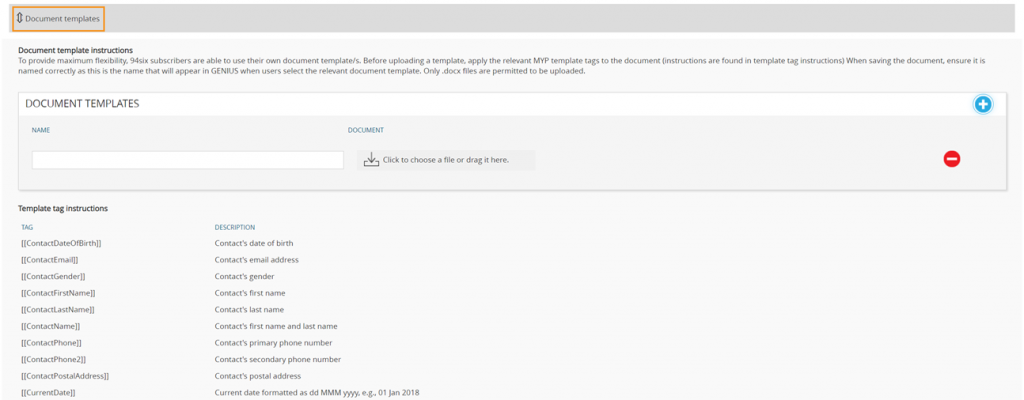
To provide maximum flexibility, 94six subscribers are able to use their own document template/s. Before uploading a template, apply the relevant MYP template tags to the document (instructions are found in template tag instructions).
When saving the document, ensure it is named correctly as this is the name that will appear in 94six when users select the relevant document template. Only .docx files are permitted to be uploaded.
To add additional document templates:
- Select ‘Add’
- Enter the template name
- Click to choose a file or drag a file to upload the document template
- Select ‘Save’ or ‘Save + close’
- To remove document templates, select ‘Delete’
The following table contains the template tags available:
| Tag |
Description |
| [[ContactDateOfBirth]] |
Contact’s date of birth |
| [[ContactEmail]] |
Contact’s email address |
| [[ContactGender]] |
Contact’s gender |
| [[ContactFirstName]] |
Contact’s first name |
| [[ContactLastName]] |
Contact’s last name |
| [[ContactName]] |
Contact’s first name and last name |
| [[ContactPhone]] |
Contact’s primary phone number |
| [[ContactPhone2]] |
Contact’s secondary phone number |
| [[ContactPostalAddress]] |
Contact’s postal address |
| [[CurrentDate]] |
Current date formatted as DD MMM YYYY, e.g., 01 Jan 2018 |
| [[CurrentDate+7]] |
Date a week from generate date |
| [[PositionTitle]] |
Staff member’s position |
| [[GeneratedByFirstName]] |
First name of the person sending the report |
| [[GeneratedByLastName]] |
Last name of the person sending the report |
| [[GeneratedByName]] |
First and last name of the person sending the report |
| [[Entity]] |
Name of the entity that the staff member belongs to |
| [[Location]] |
Location at which the staff member works |
| [[Teams]] |
Teams which the staff member is in |
| [[DirectReports]] |
Names of staff that the staff member reports to |
| [[PositionTitle]] |
Name of position description |
| [[PositionOutline]] |
Position description outline |
| [[PositionLocation]] |
Location designated for position description |
| [[EmploymentStatus]] |
Employment status of the staff member |
| [[CommencementDate]] |
Commencement date of staff member |
| [[LeaveAllowances]] |
List of leave allowances for the staff member |
| [[HoursPerWeek]] |
Workings hours per week for staff member |
| [[ProbationaryPeriod]] |
Probationary period for staff member, in days |
| [[EntityObjectives]] |
Lists objectives for the Staff member’s entity |
| [[EntityCompetencies]] |
Lists competencies for the Staff member’s entity |
| [[EntityDifferentiation]] |
Lists differentiation items for the Staff member’s entity |
| [[EntityValues]] |
Lists values for the Staff member’s entity |
| [[EntityAbout]] |
Shows the about section for the Staff member’s entity |
| [[EntityVision]] |
Shows the vision section for the Staff member’s entity |
| [[EntityMission]] |
Shows the mission section for the Staff member’s entity |
| [[OrganisationObjectives]] |
Lists objectives for the primary organisation entity |
| [[OrganisationCompetencies]] |
Lists competencies for the primary organisation entity |
| [[OrganisationDifferentiation]] |
Lists differentiation items for the primary organisation entity |
| [[OrganisationValues]] |
Lists values for the primary organisation entity |
| [[OrganisationAbout]] |
Shows the about section for the primary organisation entity |
| [[OrganisationVision]] |
Shows the vision section for the primary organisation entity |
| [[OrganisationMission]] |
Shows the mission section for the primary organisation entity |