Opportunities types and stages can be customised by ARM Pro Users. To customise an opportunity:
Customise opportunity types
Up to 30 opportunity types can be created. To create an opportunity type:
- Select ‘Customisation’ from the side navigation
- Select ‘Opportunities’
- Expand the arrow beside ‘Customise types’ + select ‘Create opportunity type’
- Enter details + select ‘Save’
- Once a number of ‘Types’ have been created, move the order of the types by dropping and dragging the types into the required order
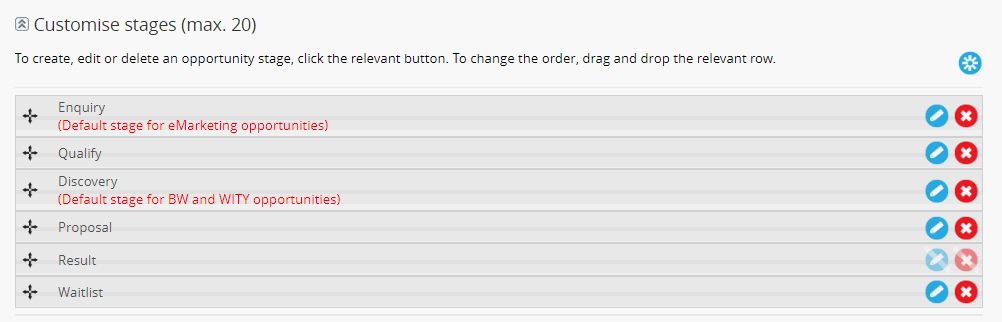
Customise opportunity stages
Up to 20 opportunity stages can be created. To create an opportunity stage:
- Select ‘Customisation’ from the side navigation
- Select ‘Opportunities’
- Expand the arrow beside ‘Customise stages’ + select ‘Create’
- Enter details + select ‘Save’
- Once a number of ‘Stages’ have been created, move the order of the stages by dropping + dragging the stages into the required order
Customise opportunity activities
Up to 20 opportunity activities can be created. To create an opportunity activity:
- Select ‘Customisation’ from the side navigation
- Select ‘Opportunities’
- Expand the arrow beside ‘Customise activities’ + select ‘Create’
- Enter details + select ‘Save’
- Once a number of ‘Activities’ have been created, move the order of the activities by dropping and dragging the activities into the required order
NB: The customised types, stage and activities will appear in drop-down menus on the Opportunities page and when generating the Opportunity reports. Activities can be set as a required field when manually adding a note to Contact History.
Customise opportunity outcome reasons
To create an opportunity outcome reason:
- Select ‘Customisation’ from the side navigation
- Select ‘Opportunities outcome reasons’
- Select the relevant outcome type
- Select ‘Create’
- Enter details + select ‘Save’
- Move the order of the outcomes by dragging + dropping the activities into the required order. All custom reasons must appear after the standard reasons.
NB: If a reason has an existing outcome reason, the outcome type is no longer editable.
Re-assign opportunities
Once opportunity types and stages have been customised, pre-existing opportunity stages may need to be re-assigned. To re-assign an opportunity:
- Select ‘Customisation’ from the side navigation
- Select ‘Opportunities’
- Select ‘Re-assign’
- Use the filters to identify the client + opportunity
- Re-assign as required
- Select ‘Save’
NB: Some MYP modules have default opportunity stages already set as per the following screenshot. If a default stage is to be re-assigned, another stage must be assigned as the new default stage for that module.